- Joined
- Feb 9, 2026
- Messages
- 30
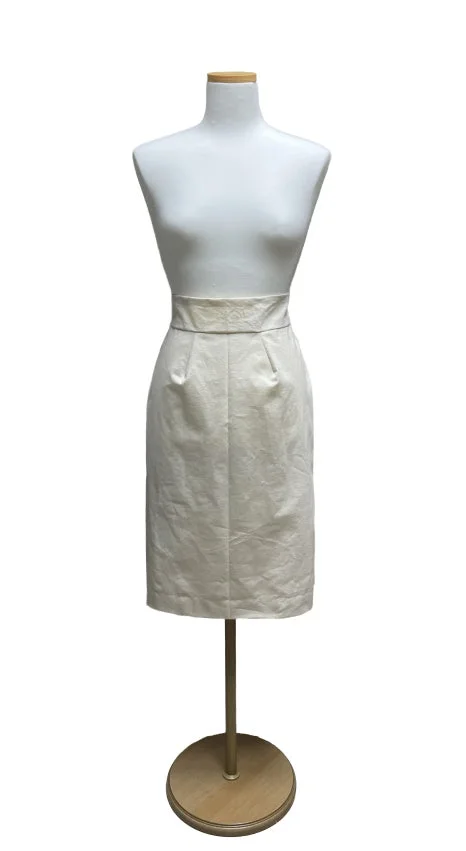
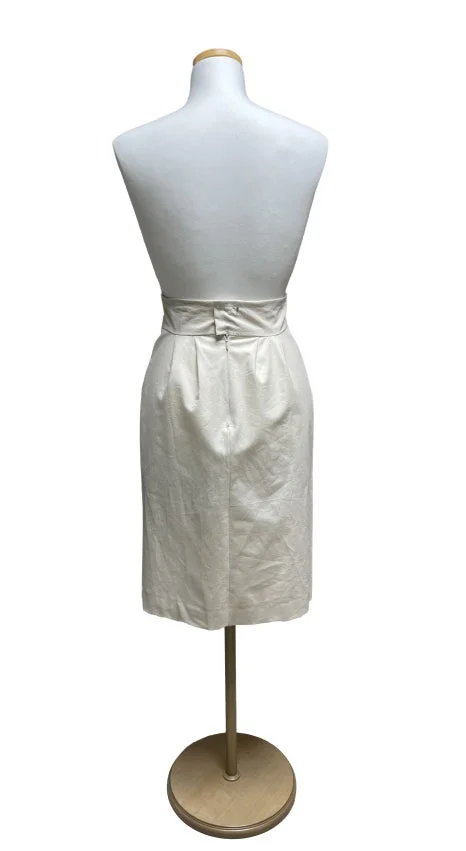
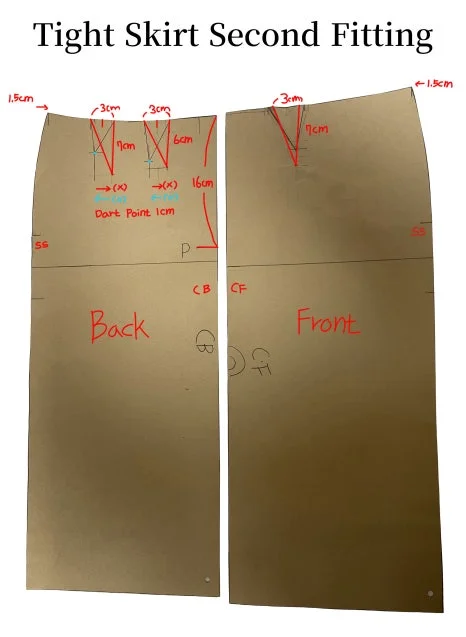
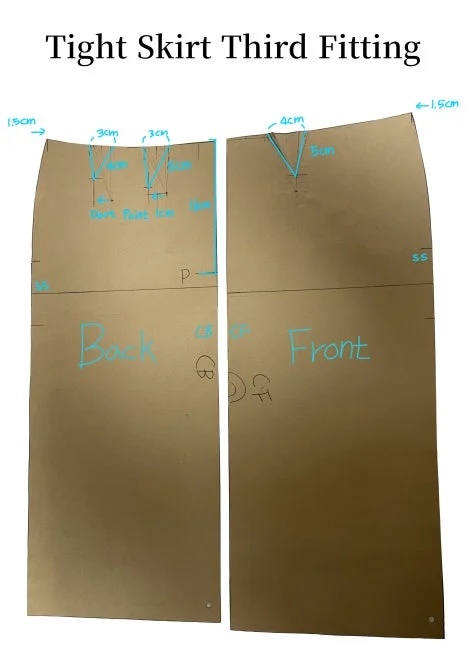
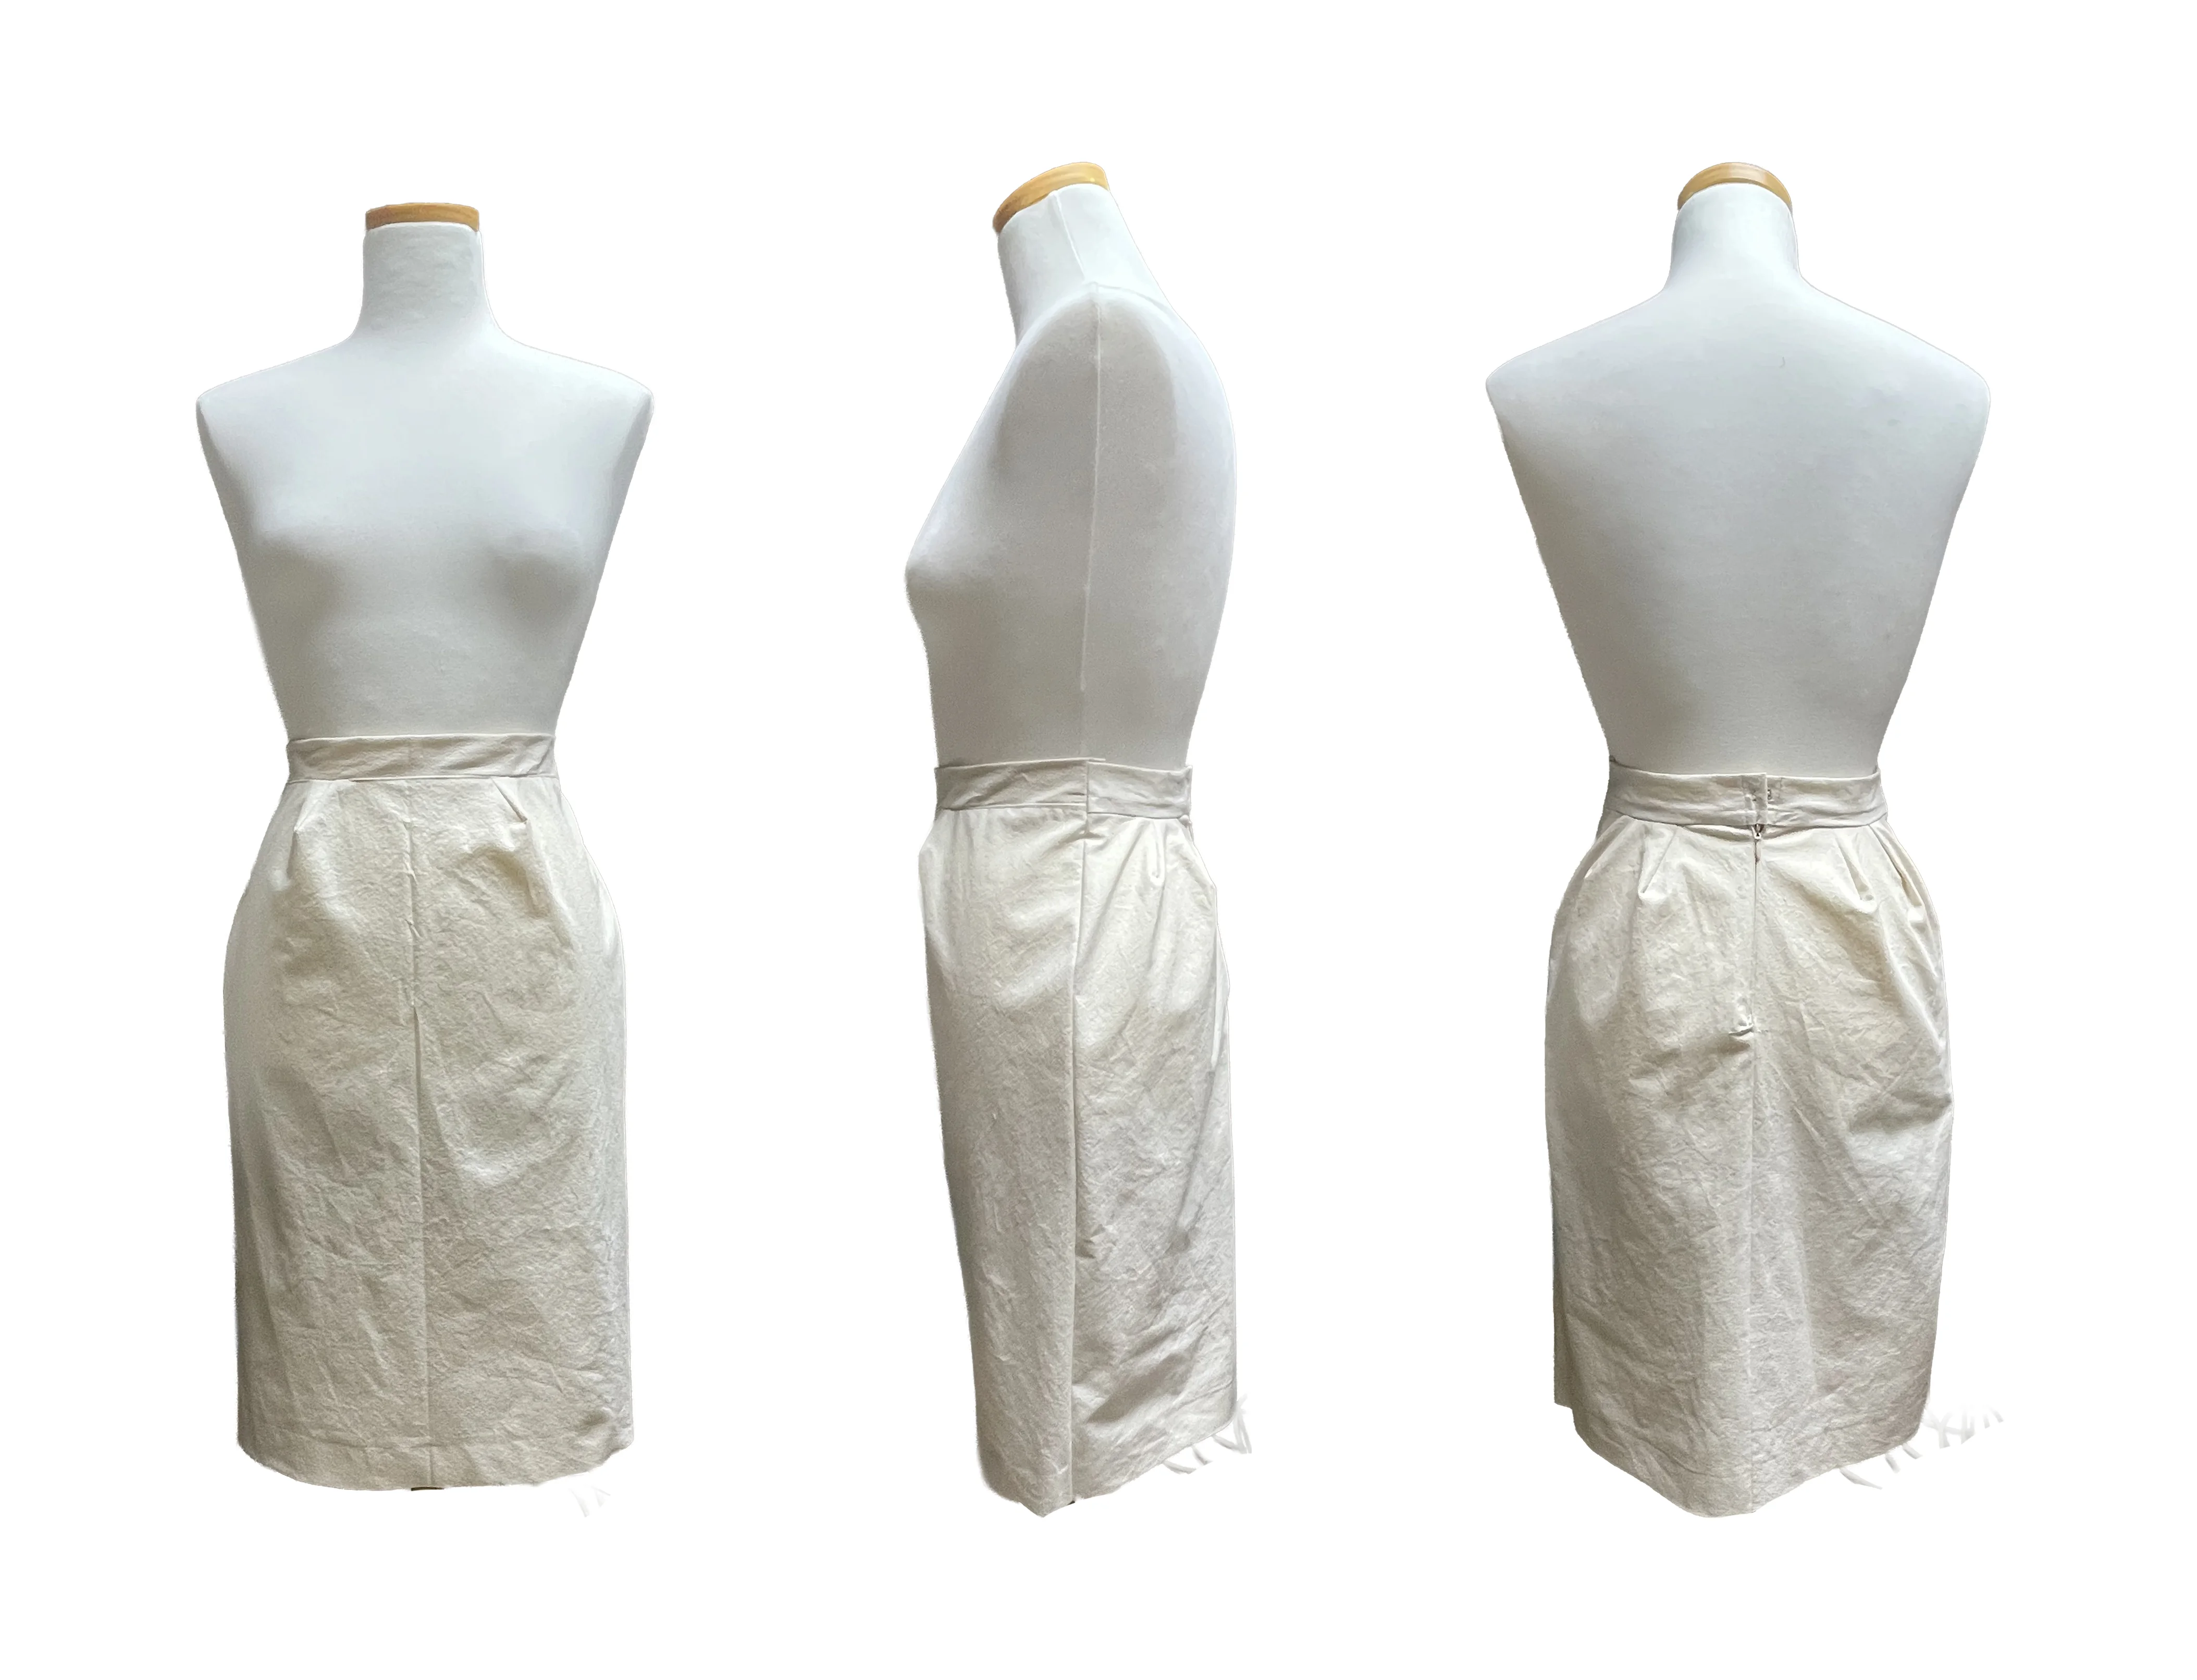
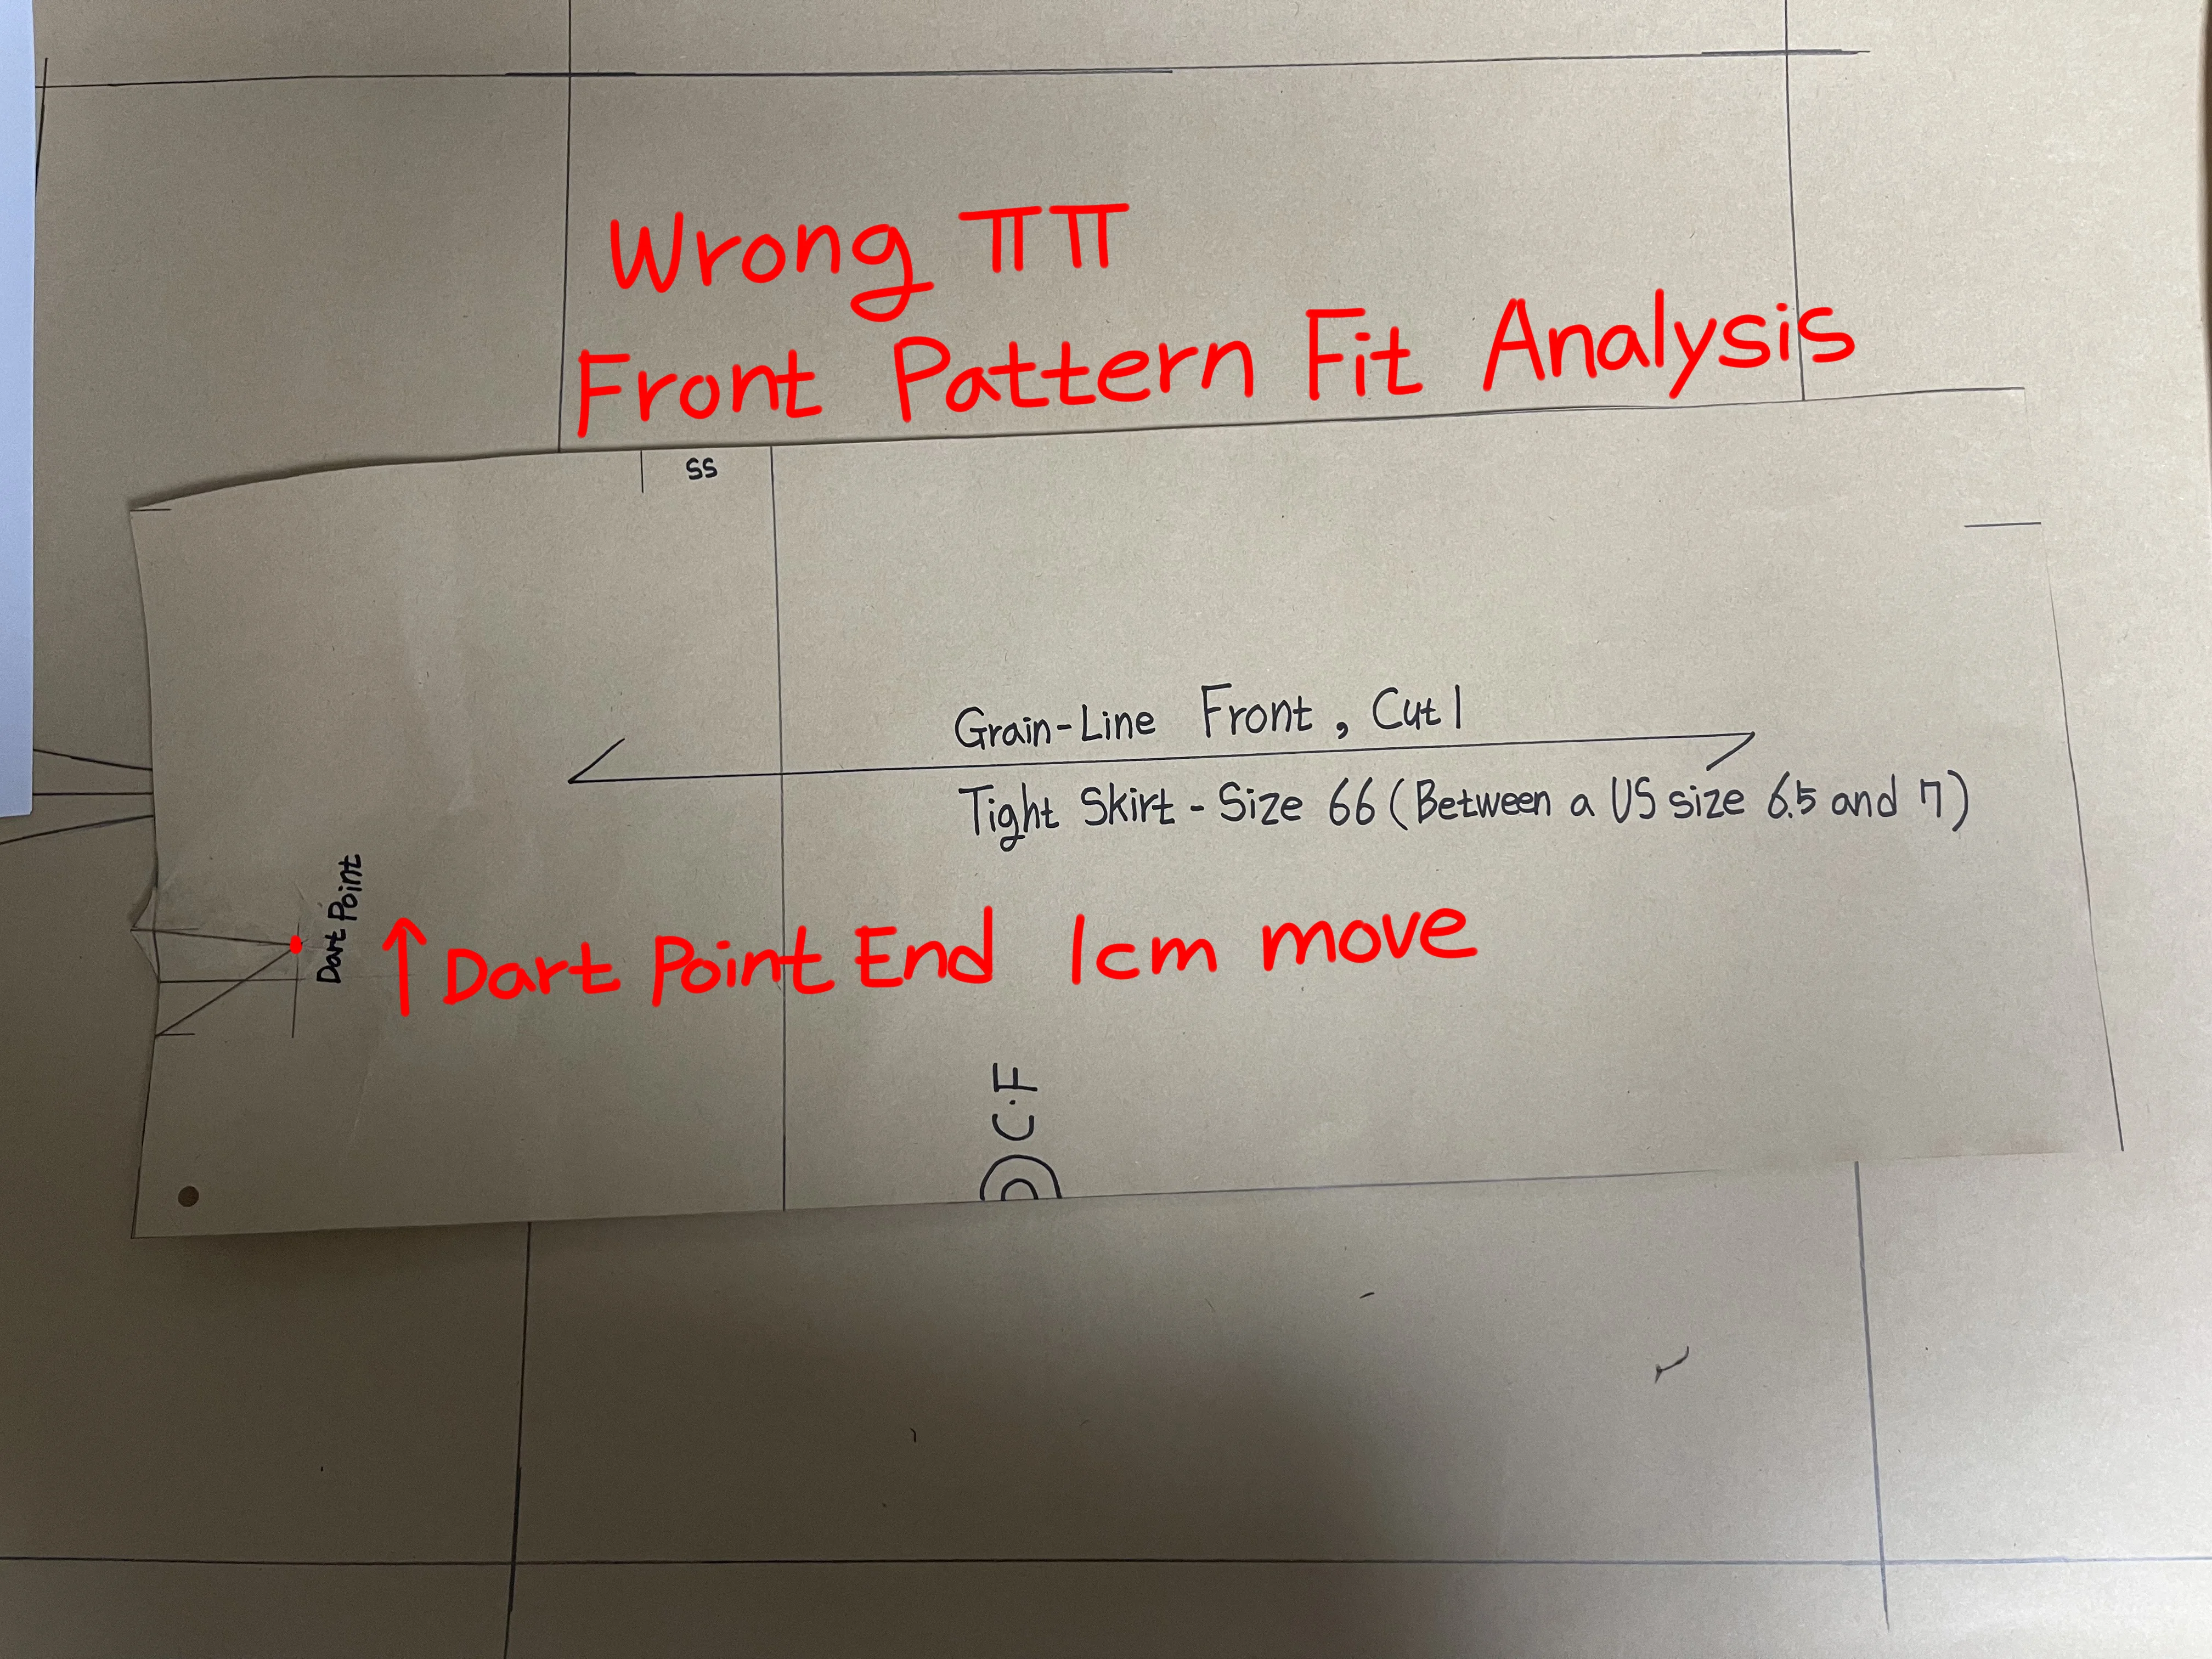
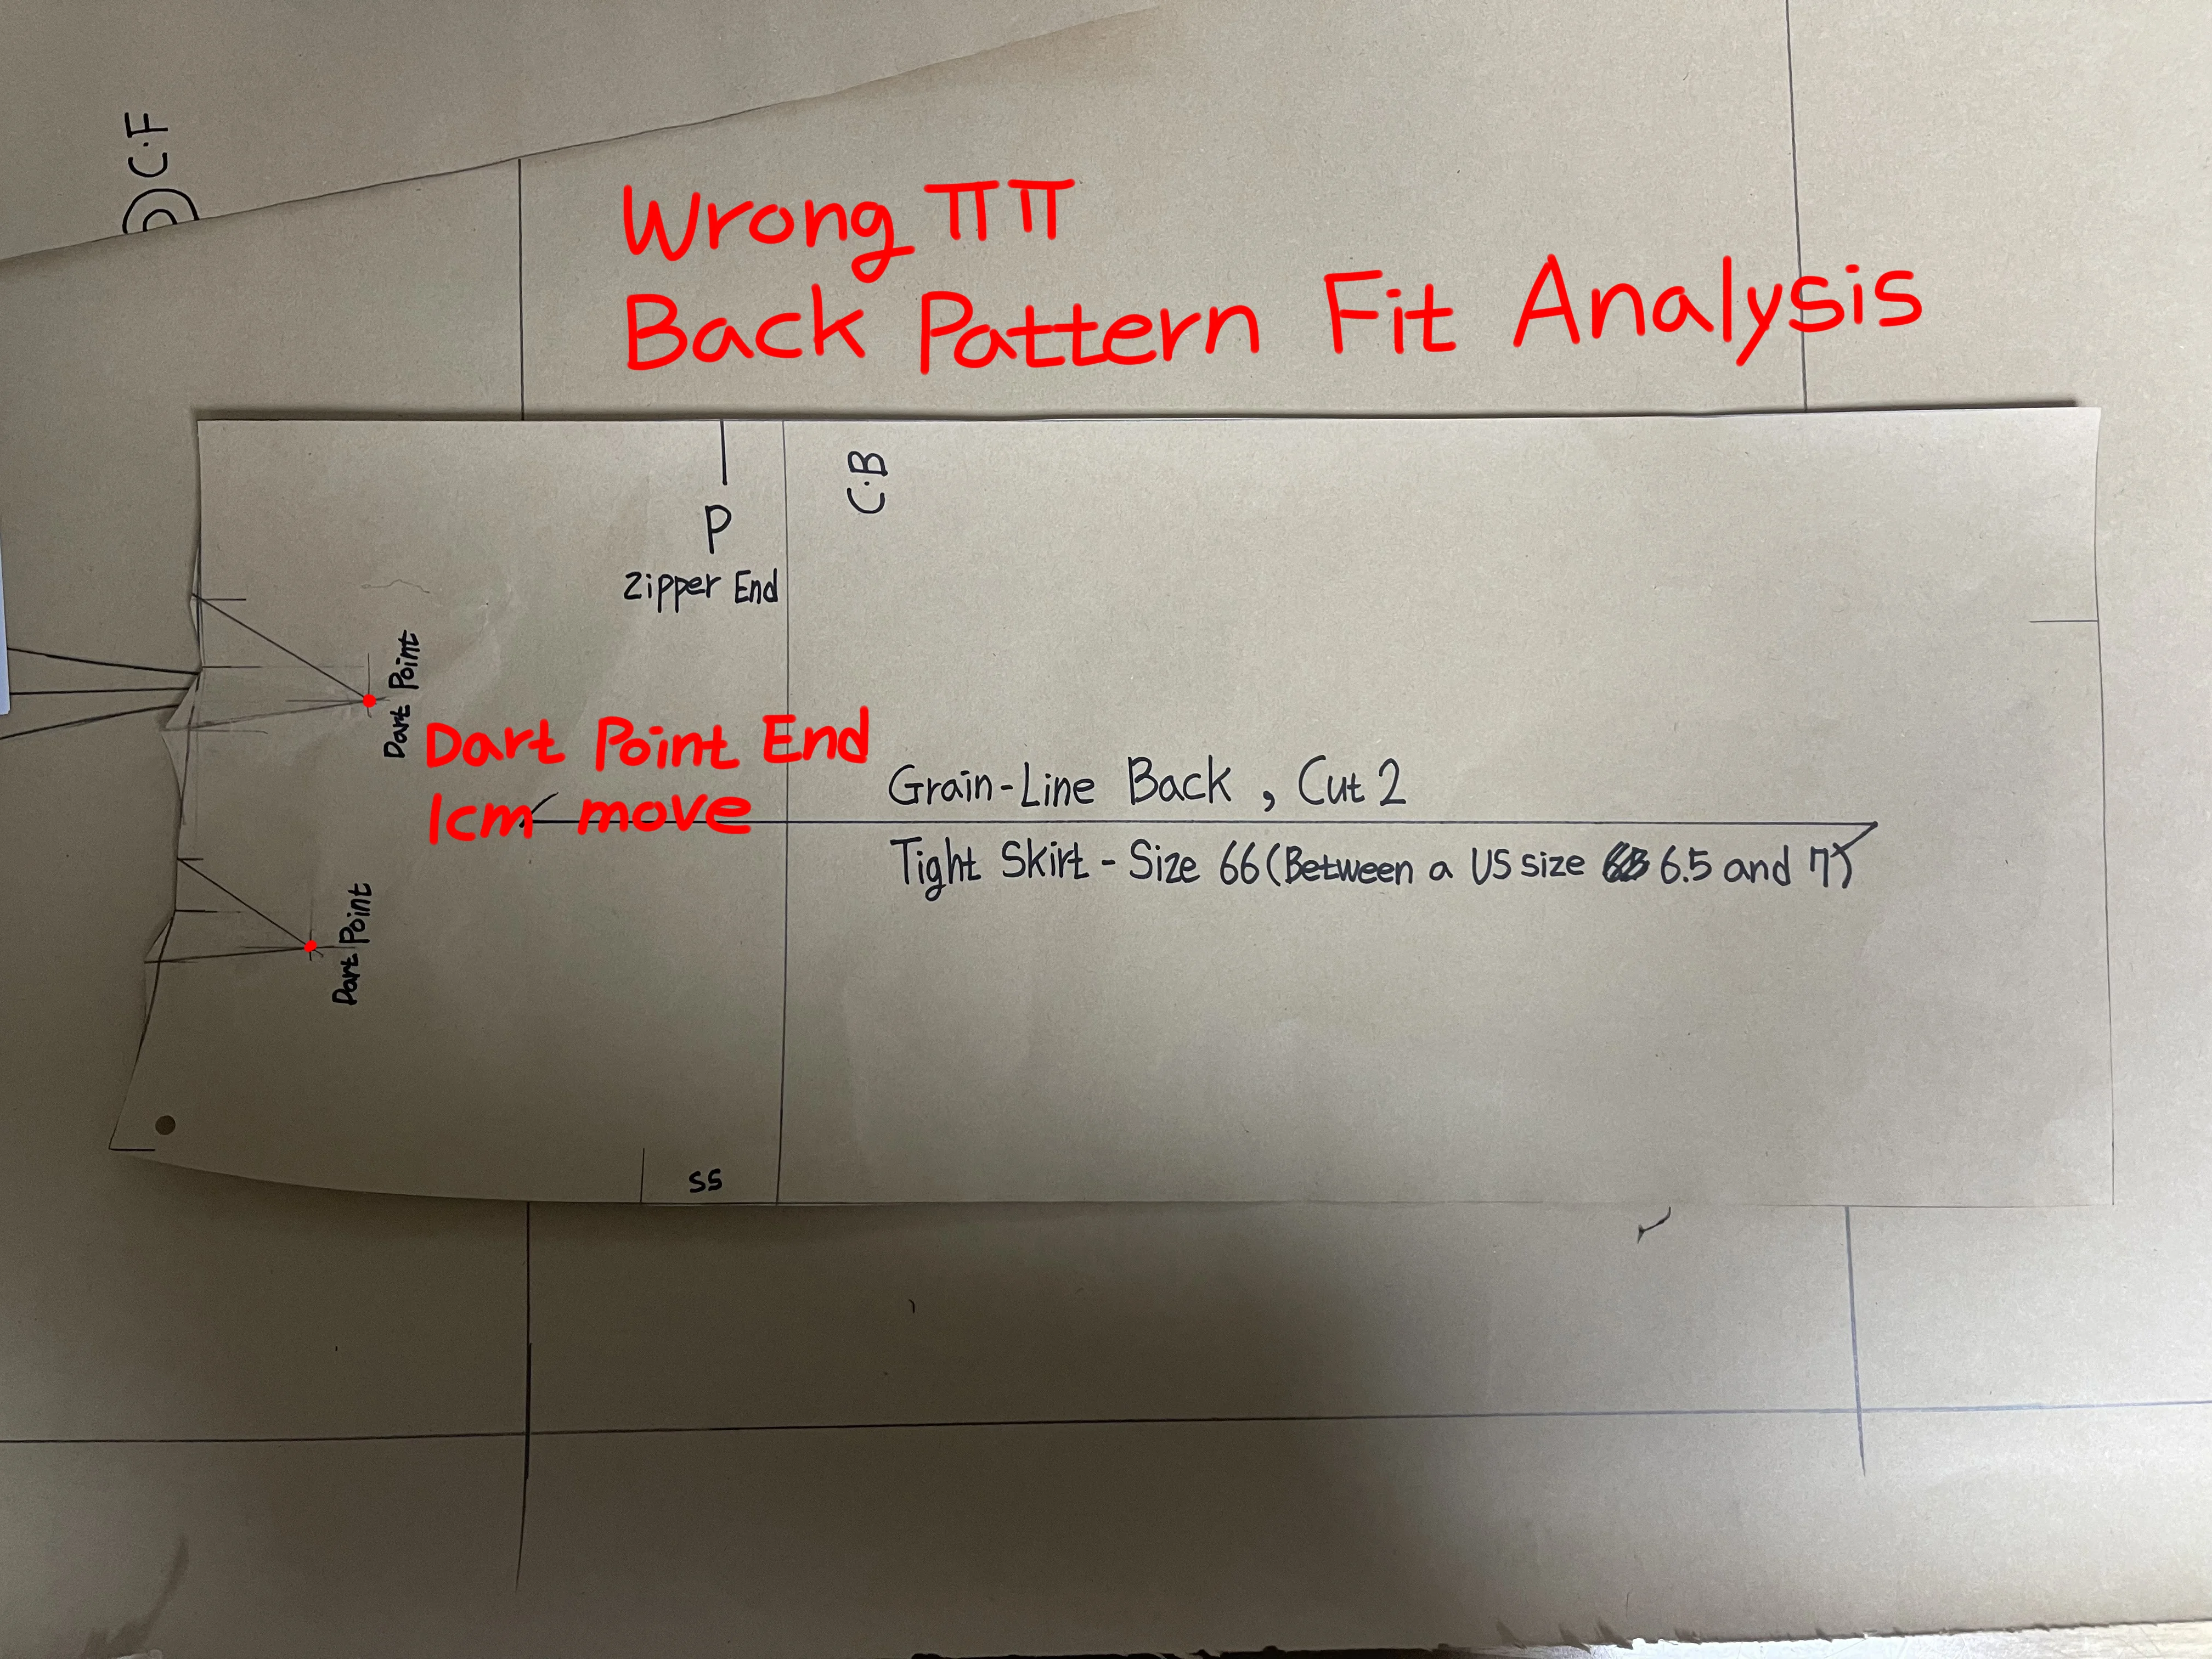
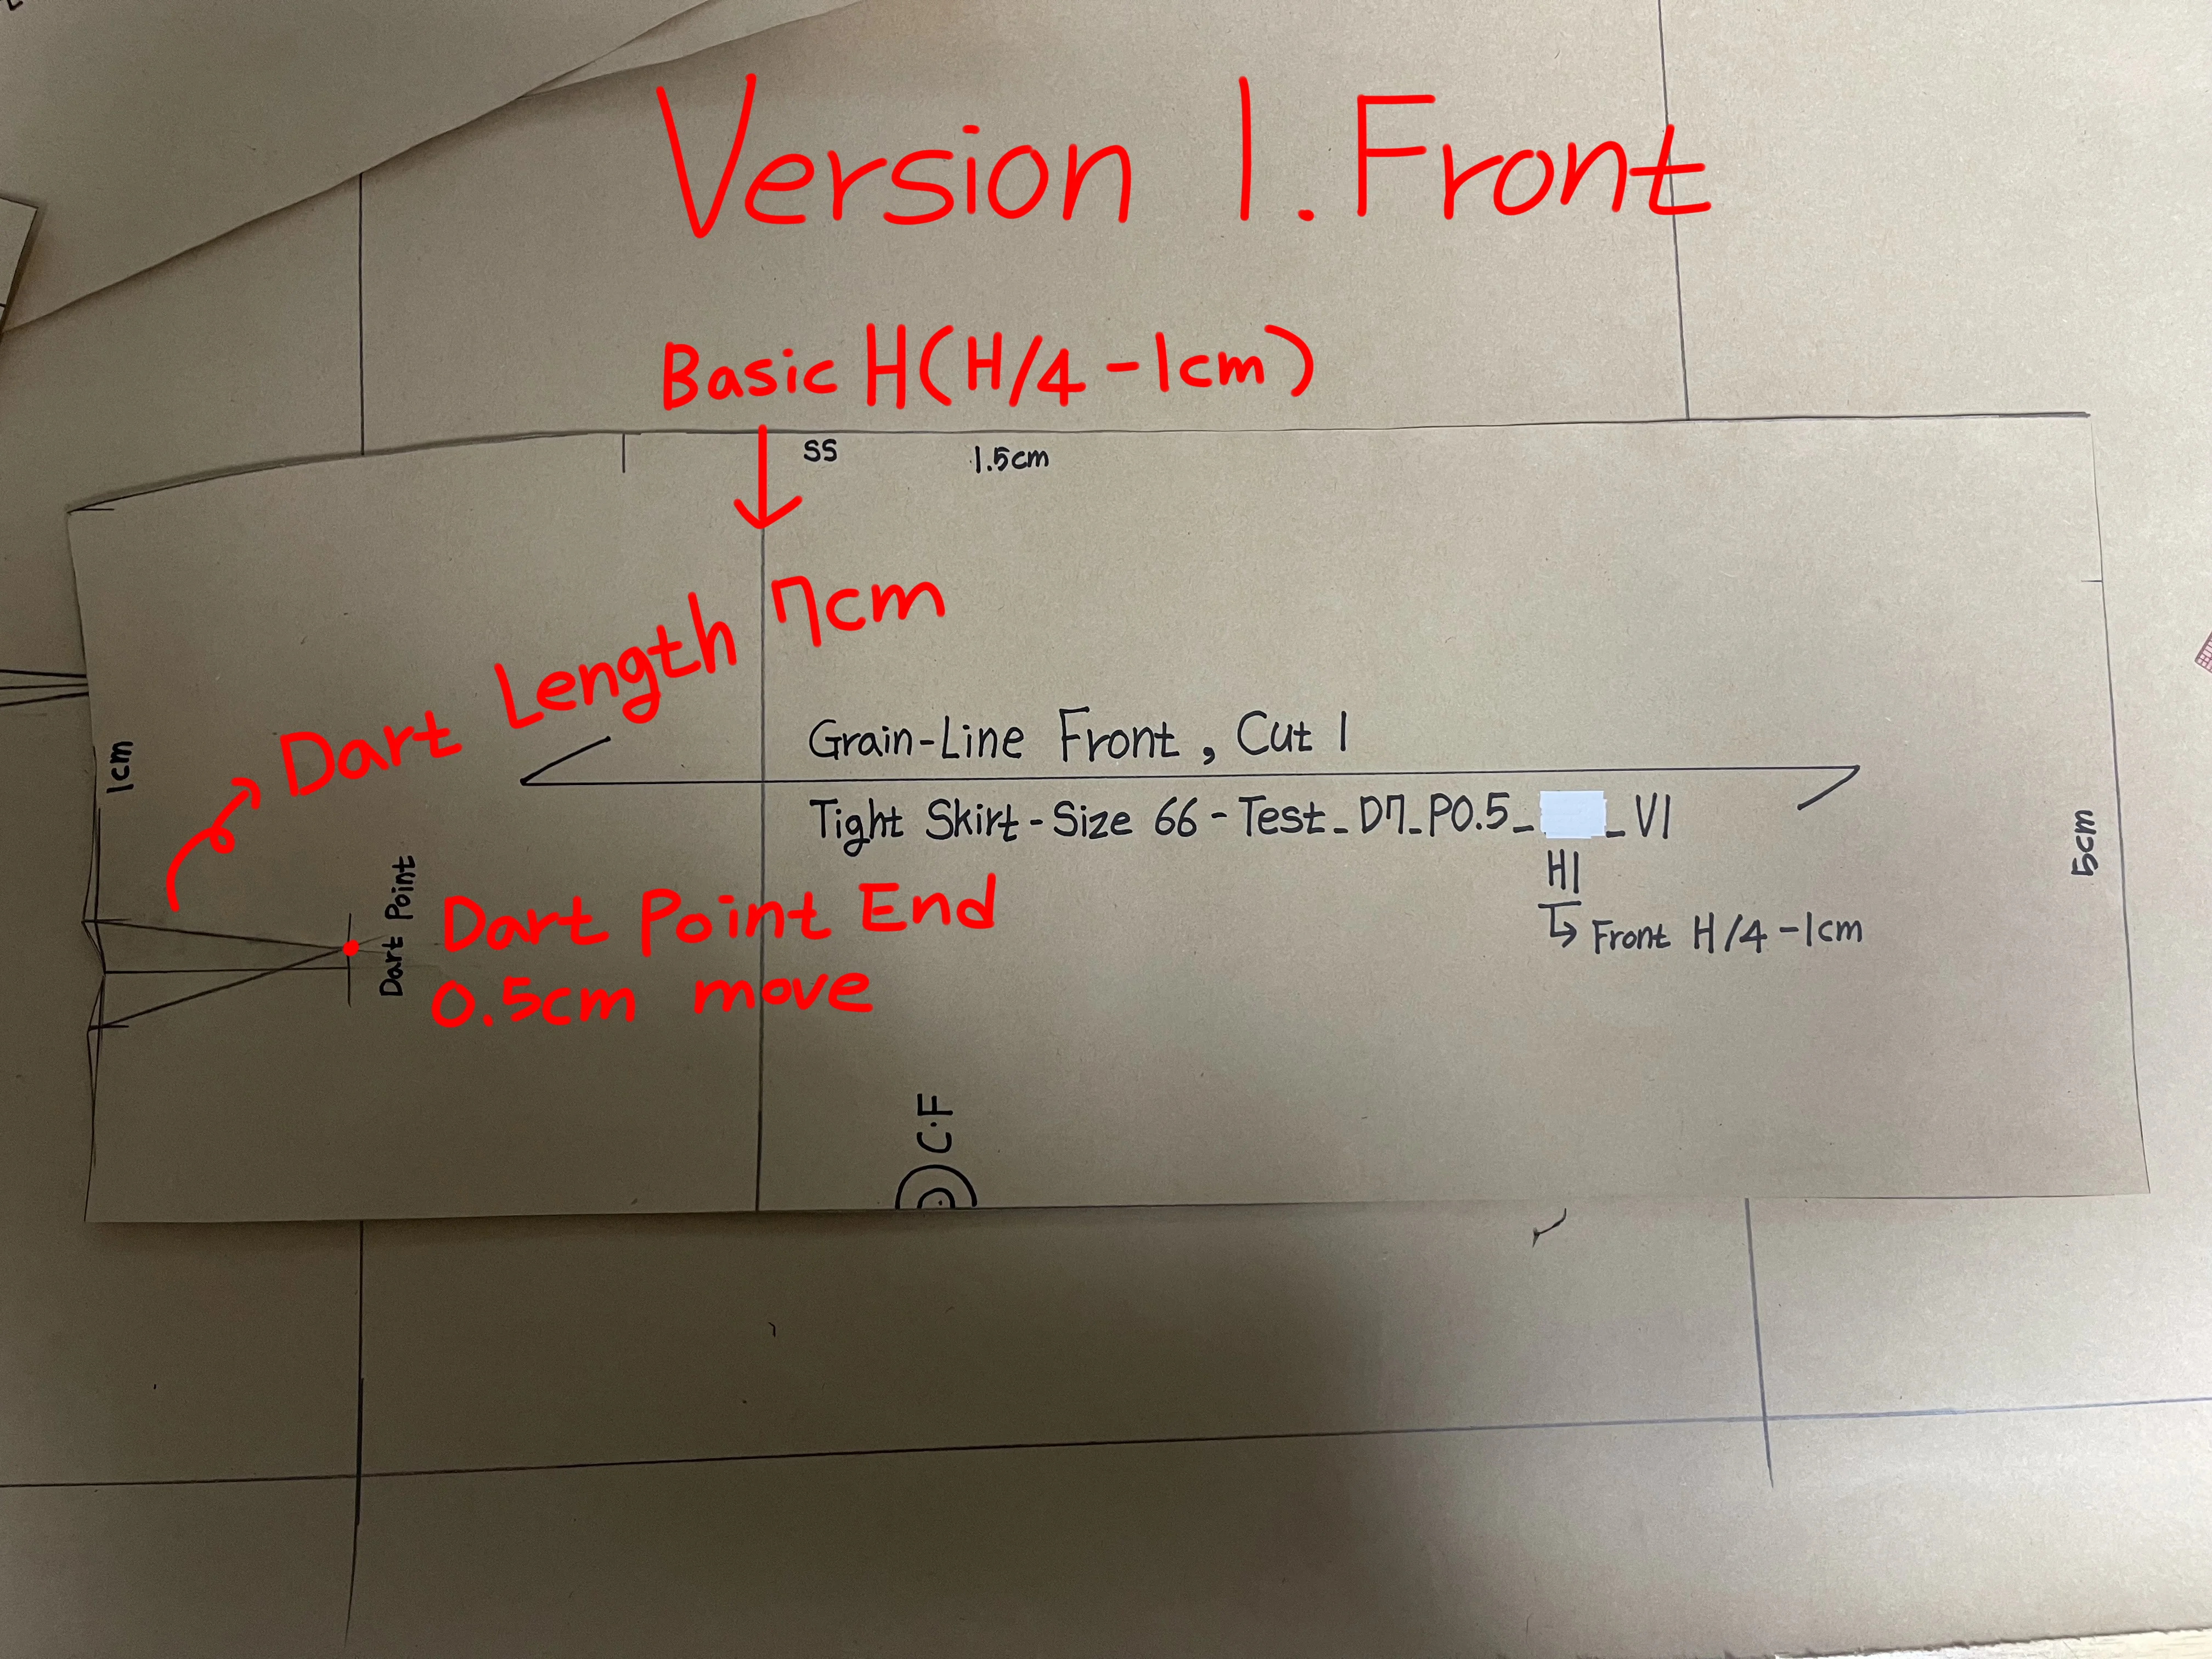
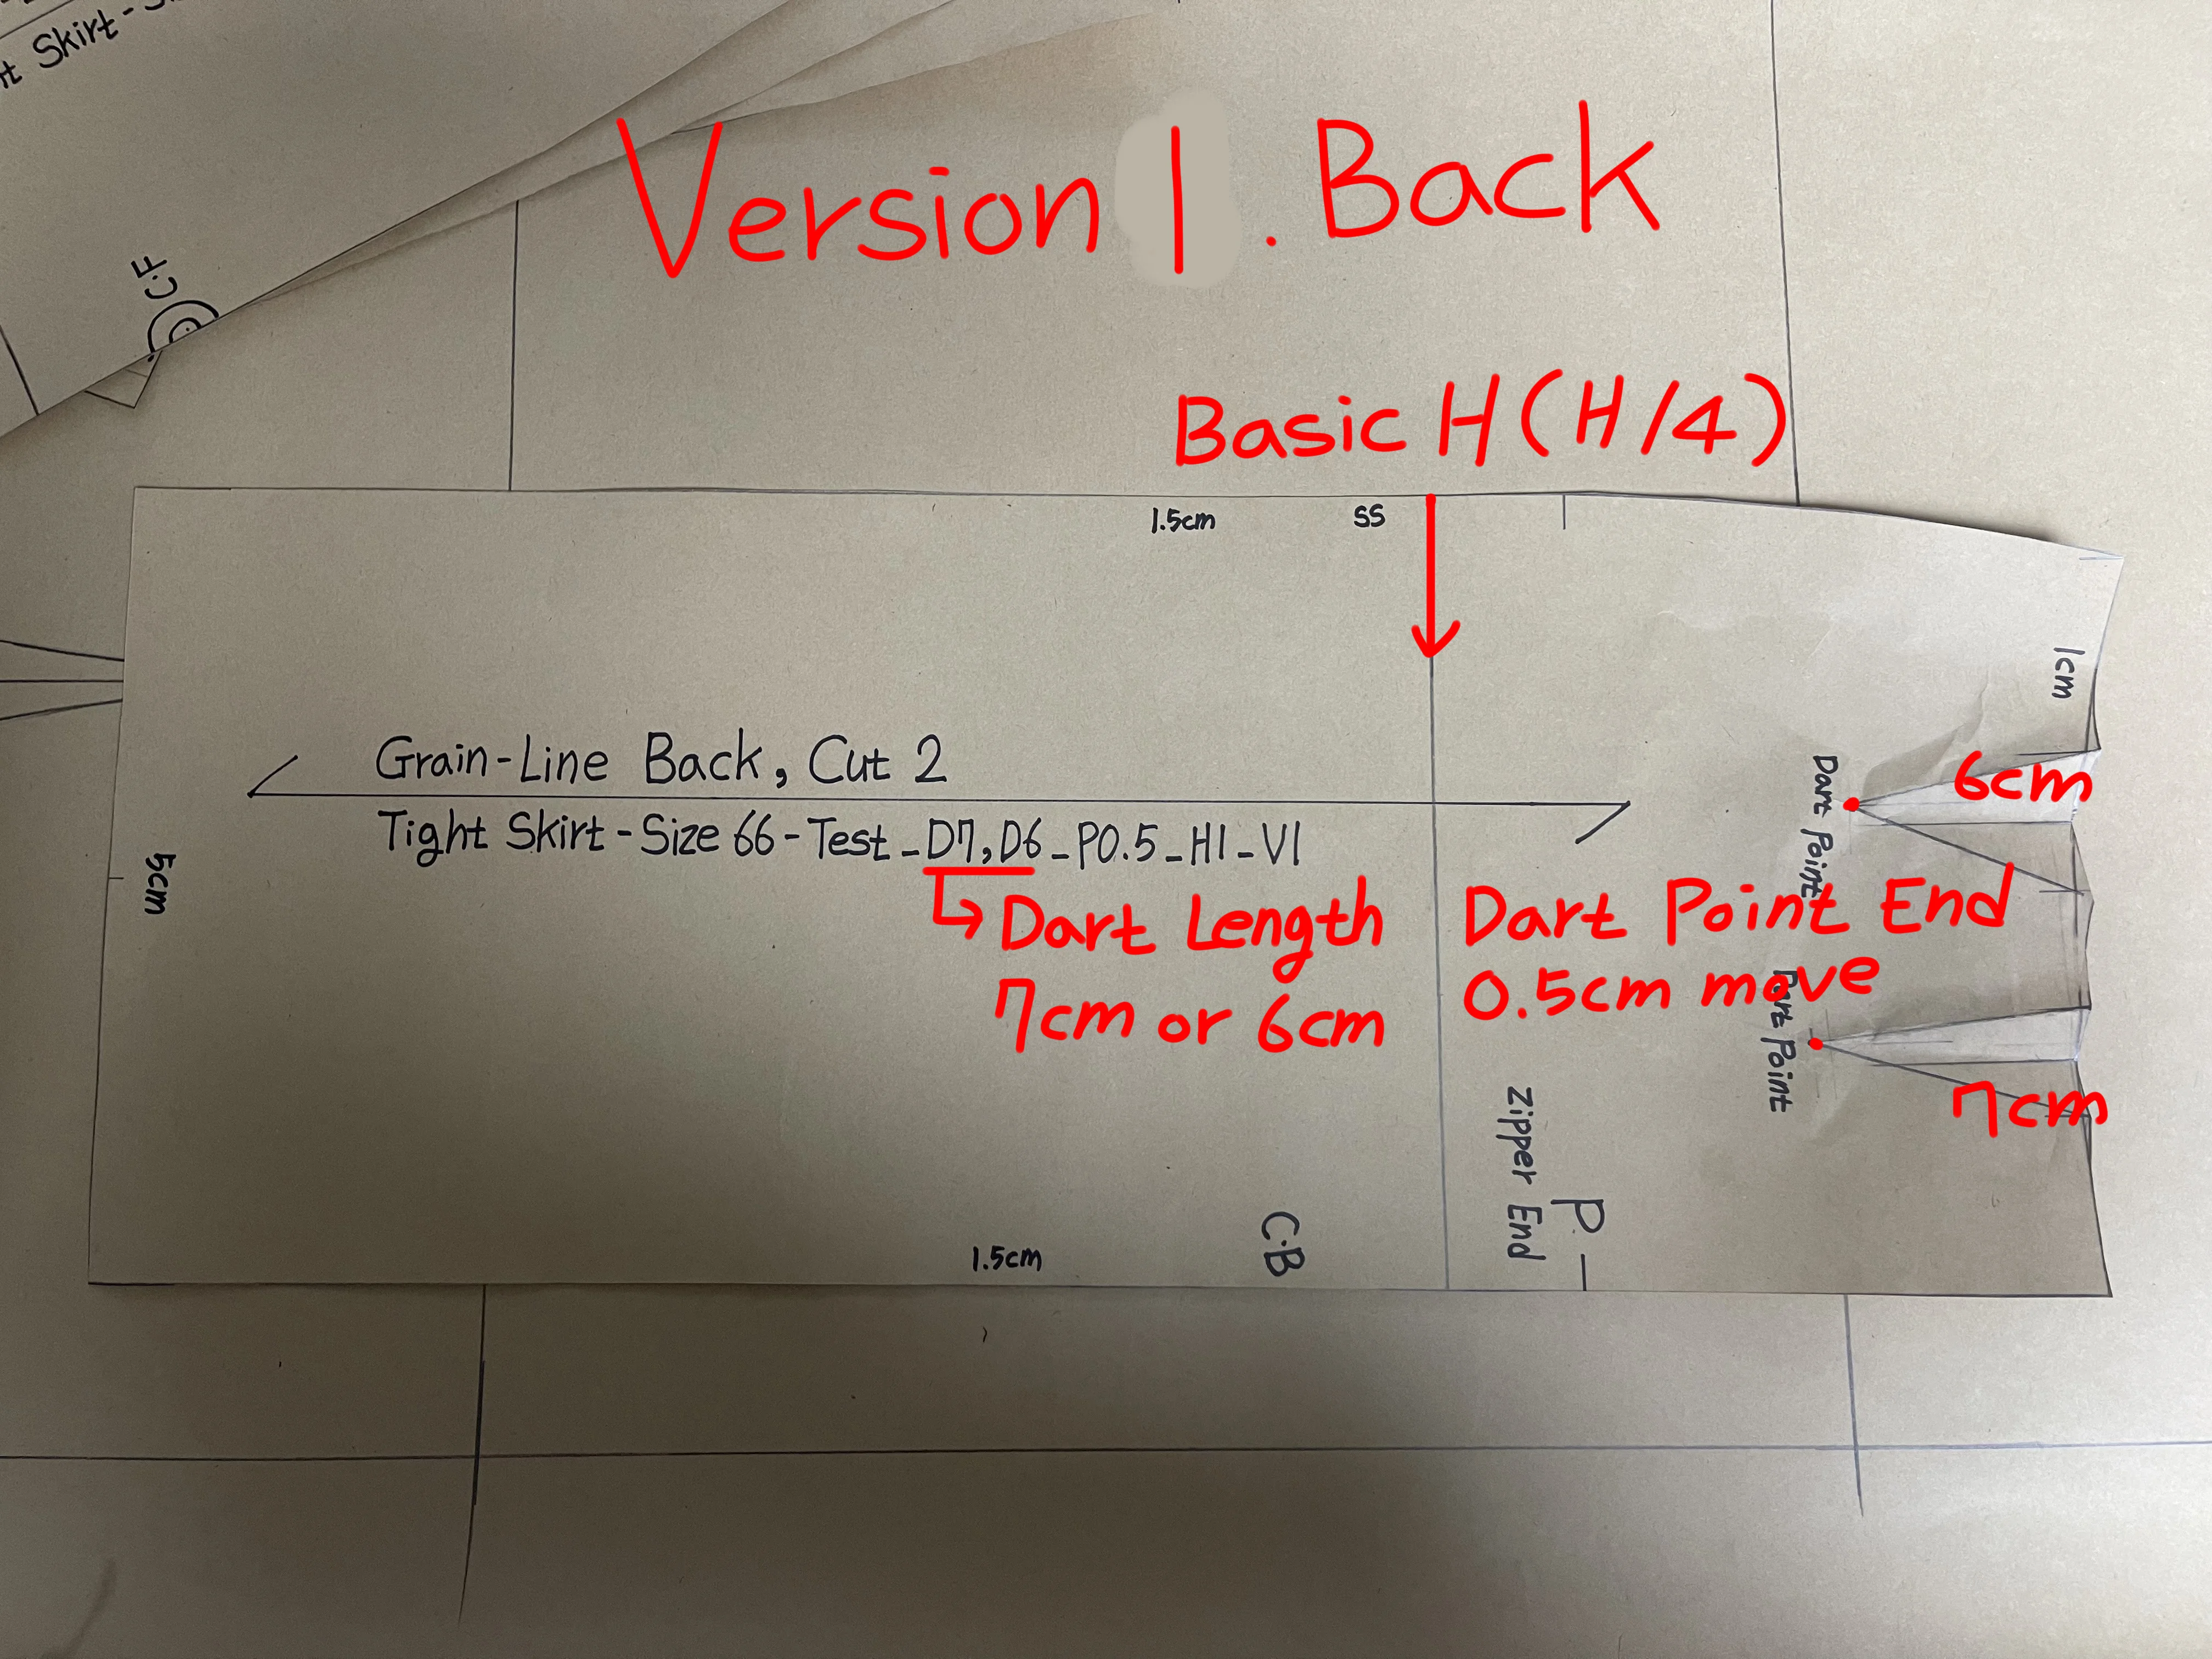
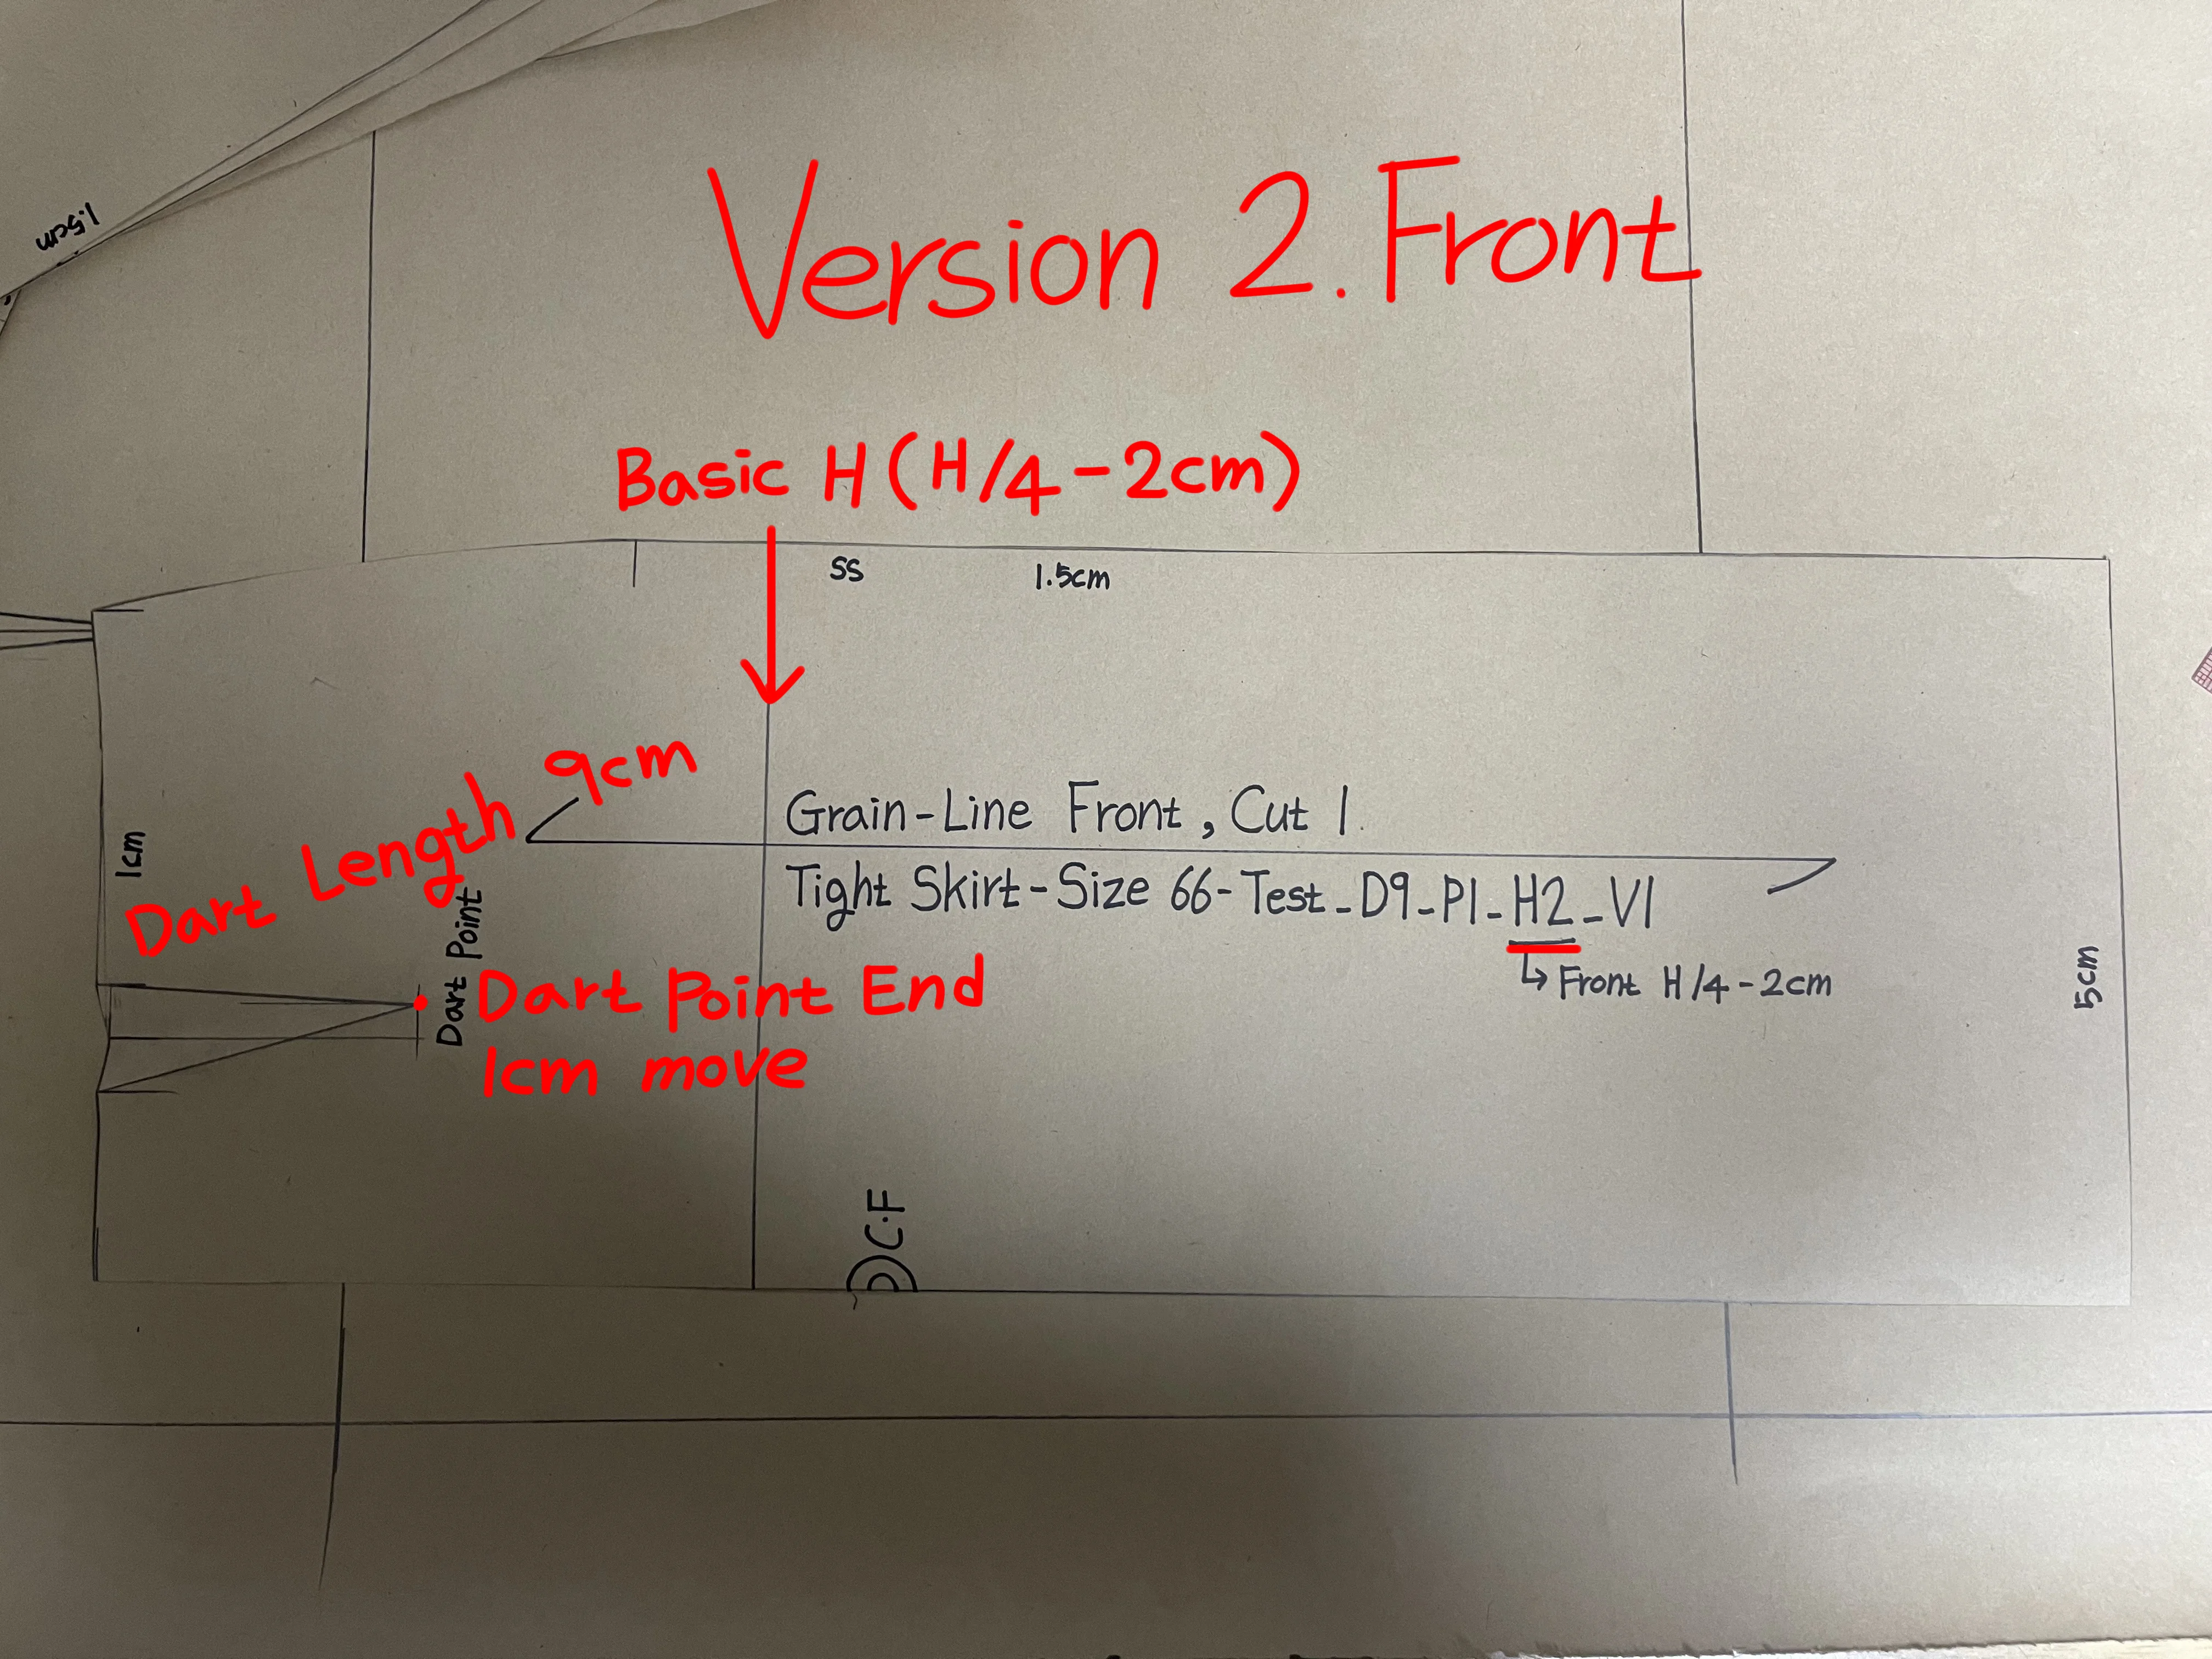
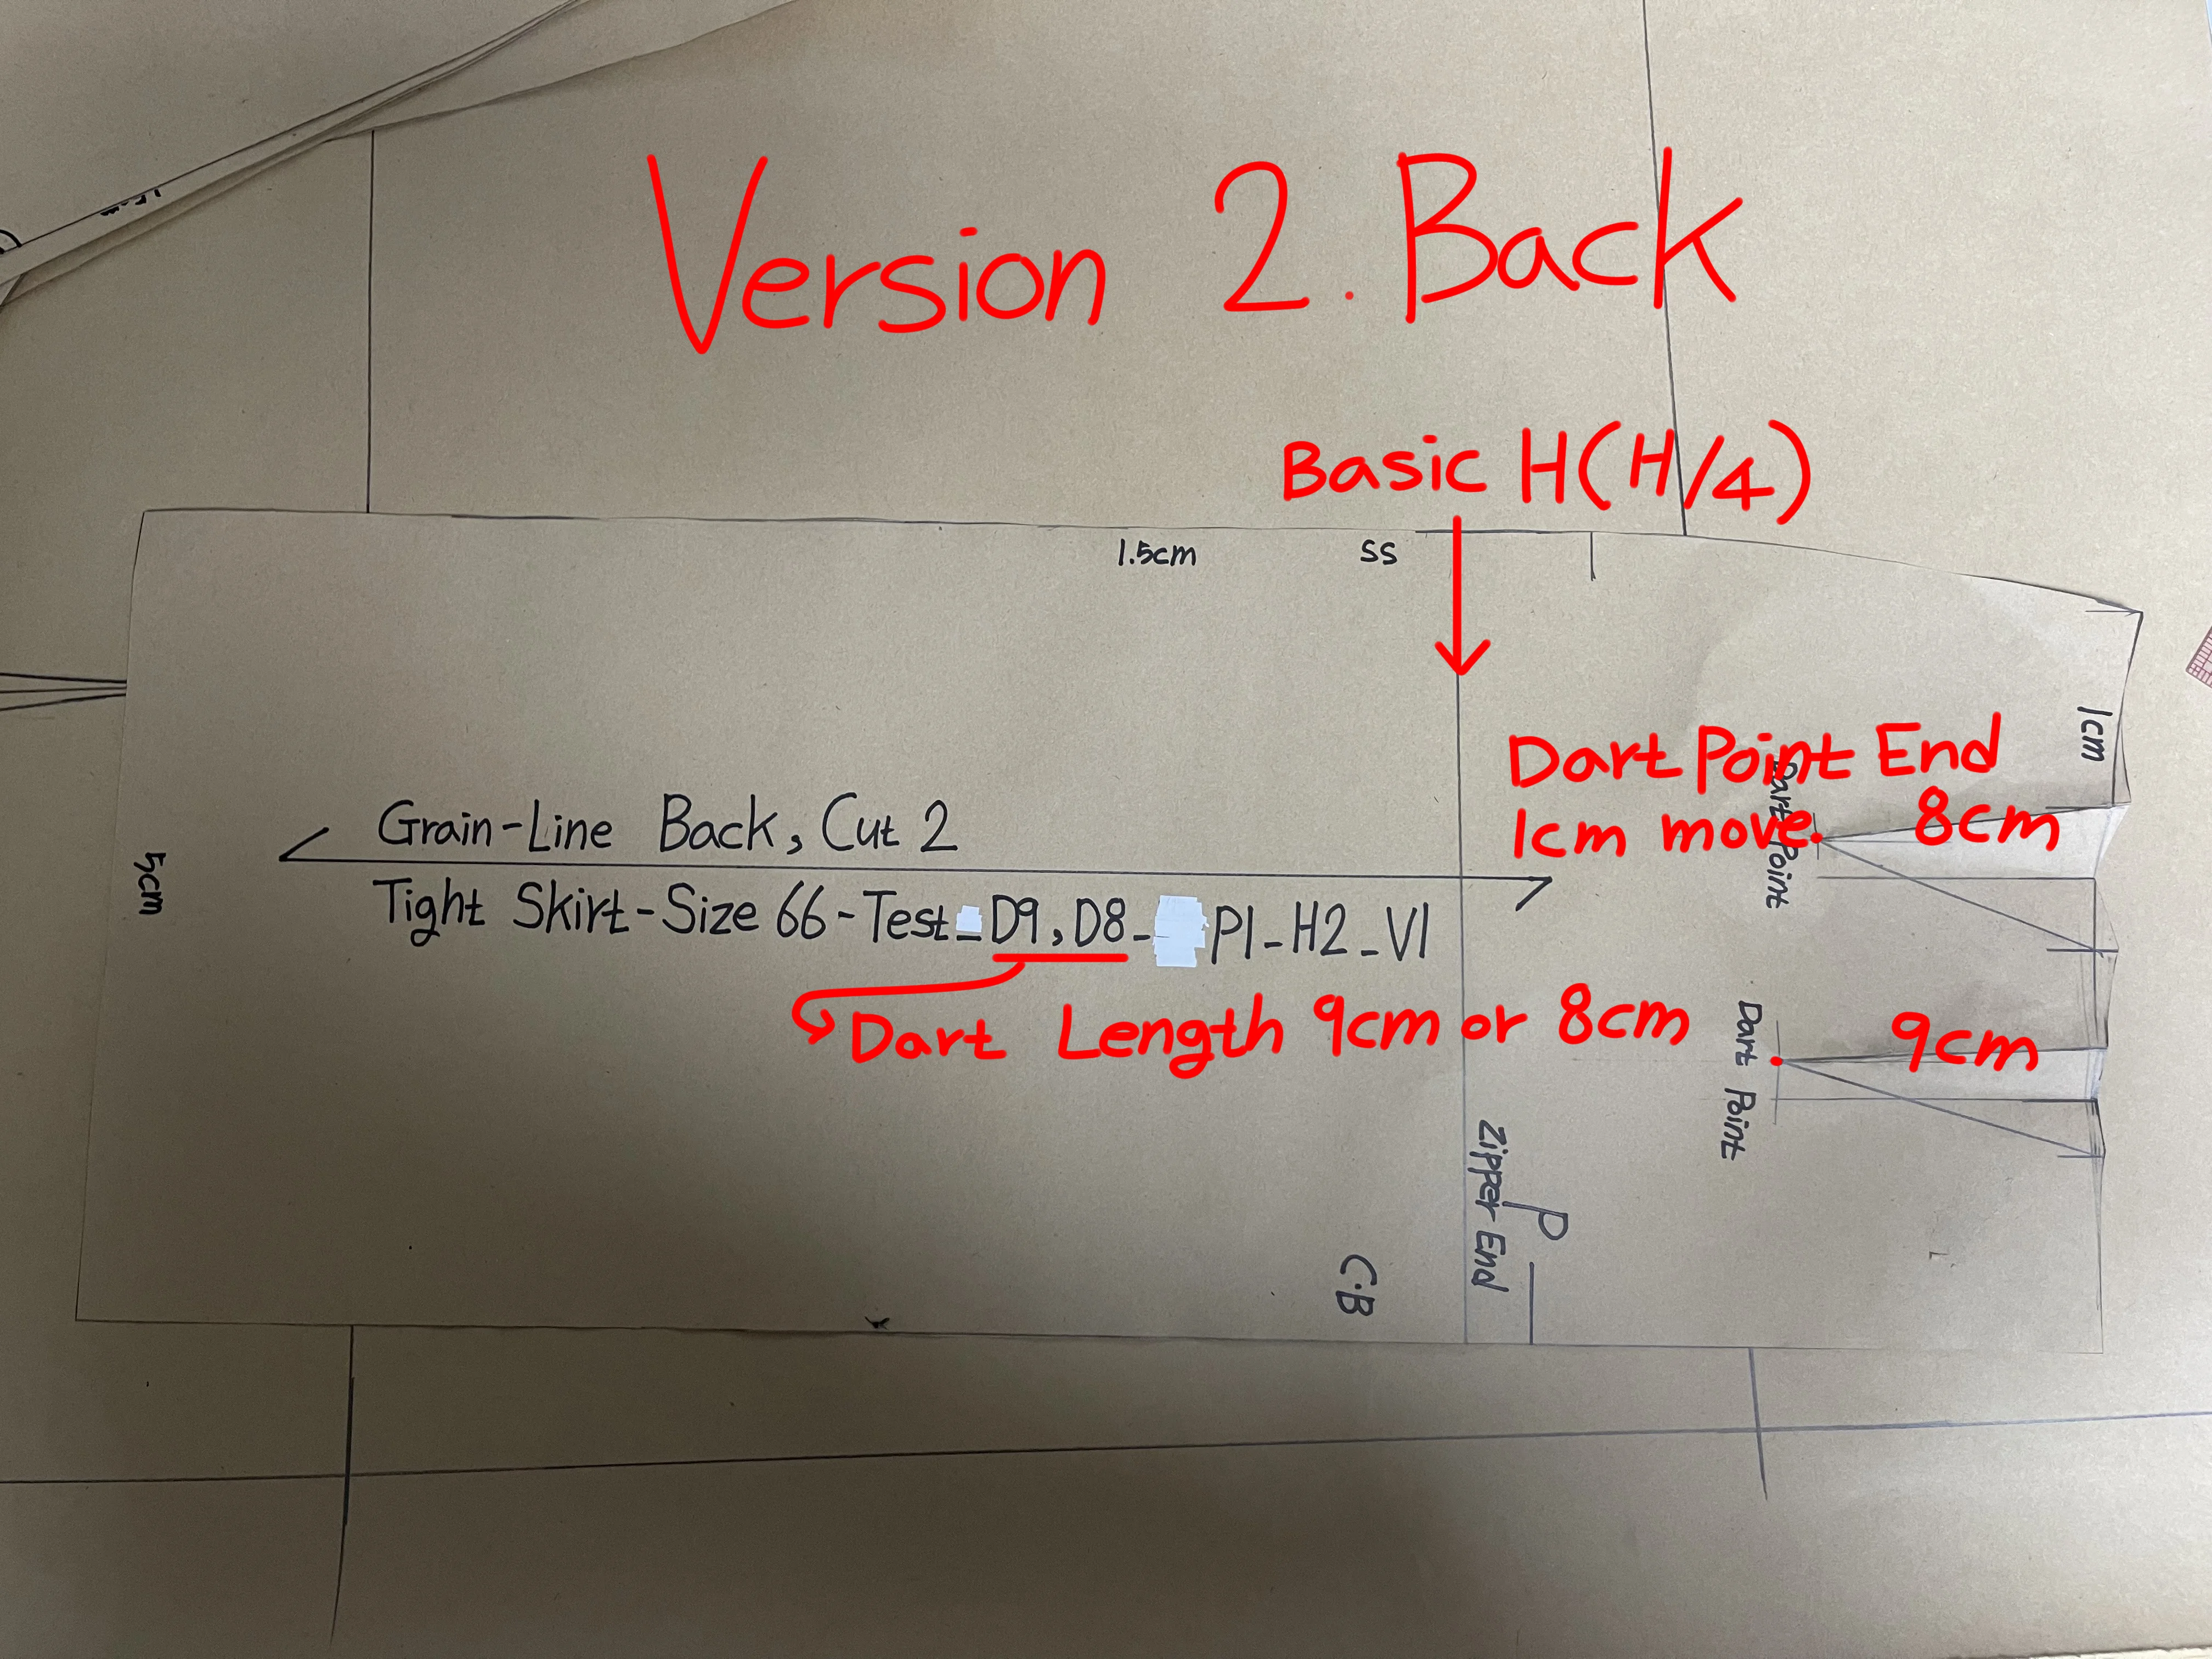
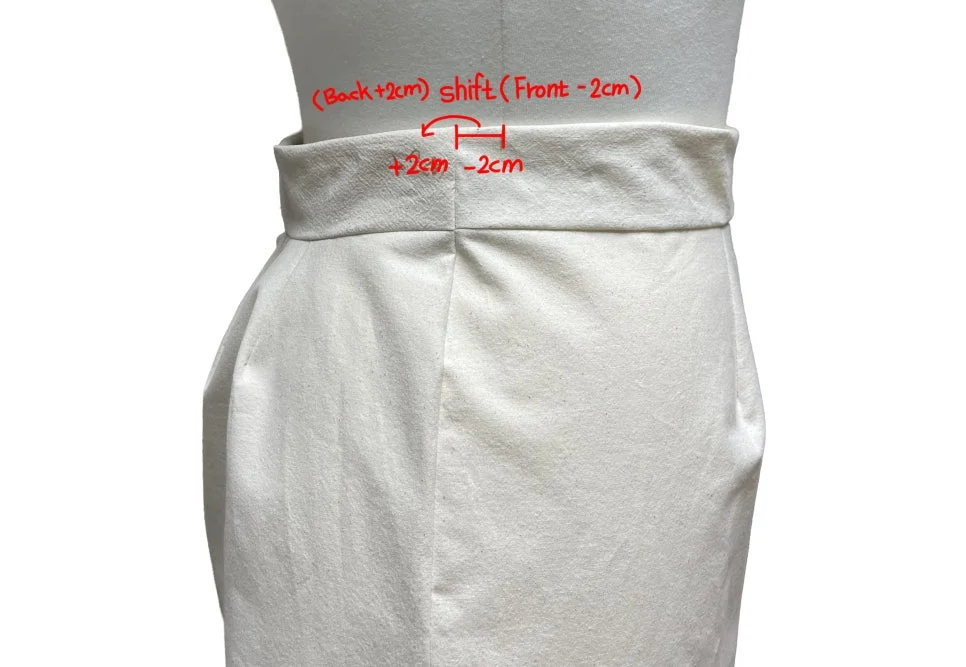
The back panel needs an additional +2 cm in width, while the front panel requires a reduction of 2 cm. Therefore, this image reflects the condition before these adjustments were applied.
1. Front Panel Analysis
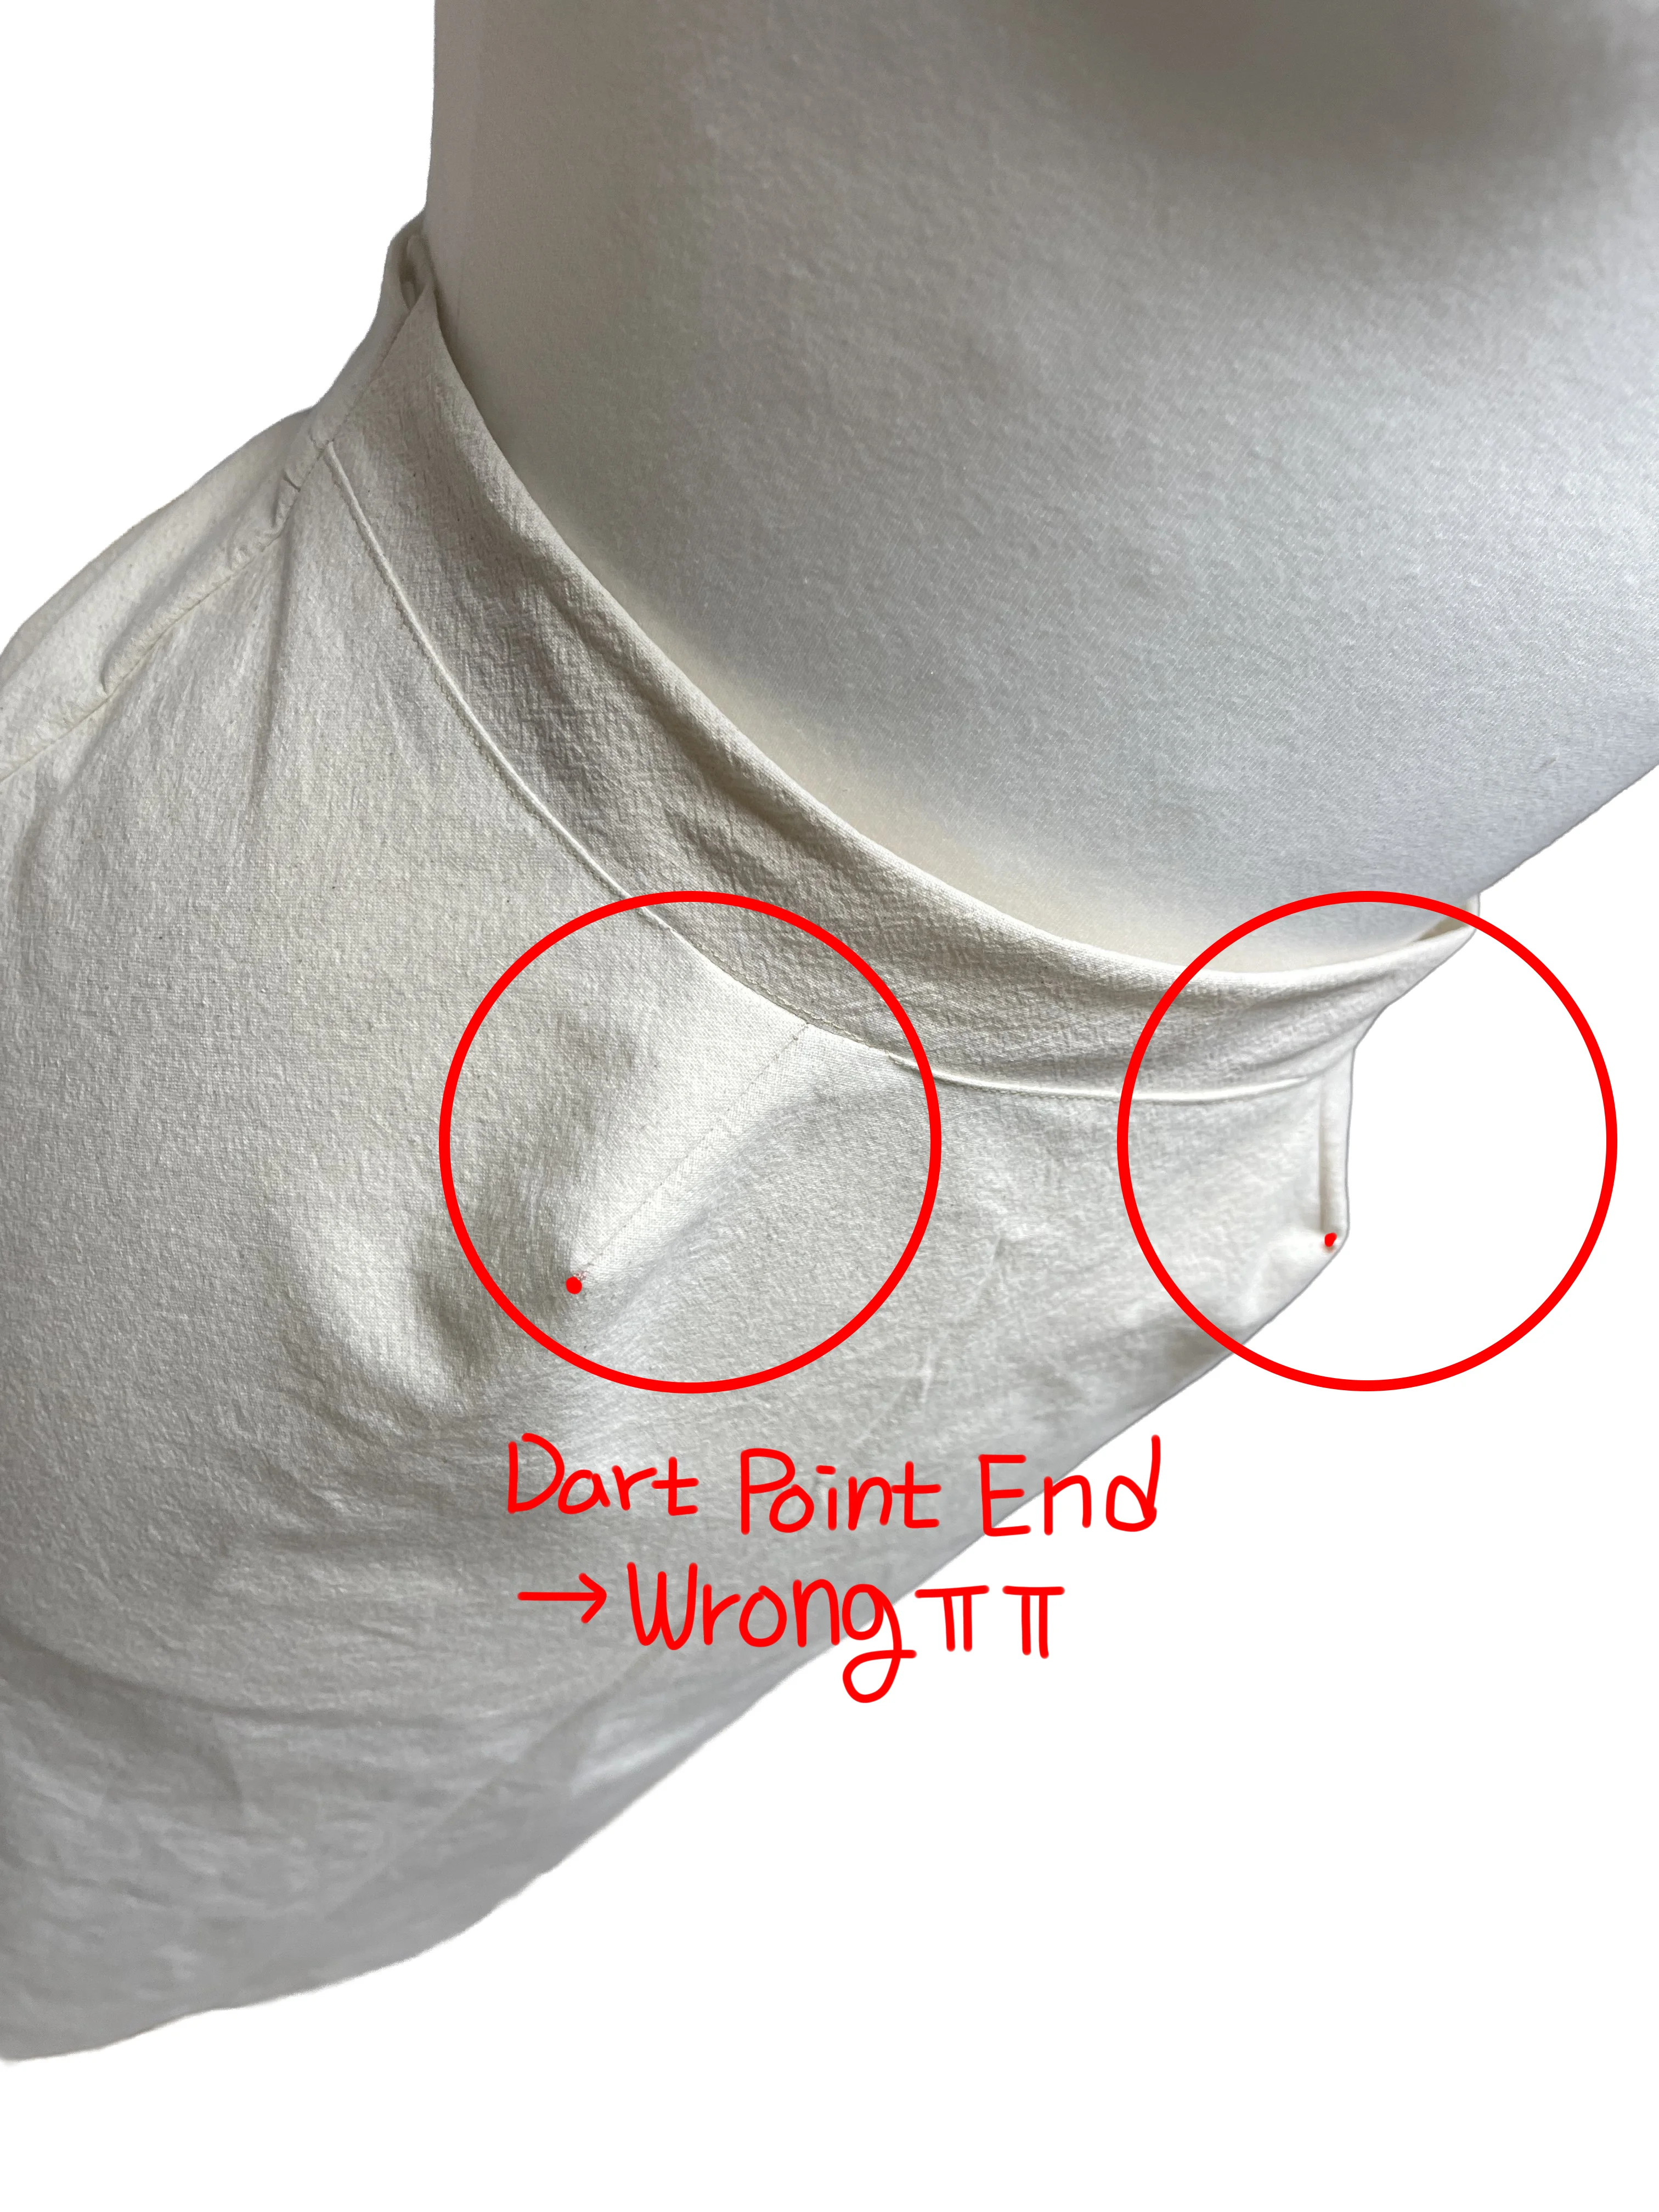
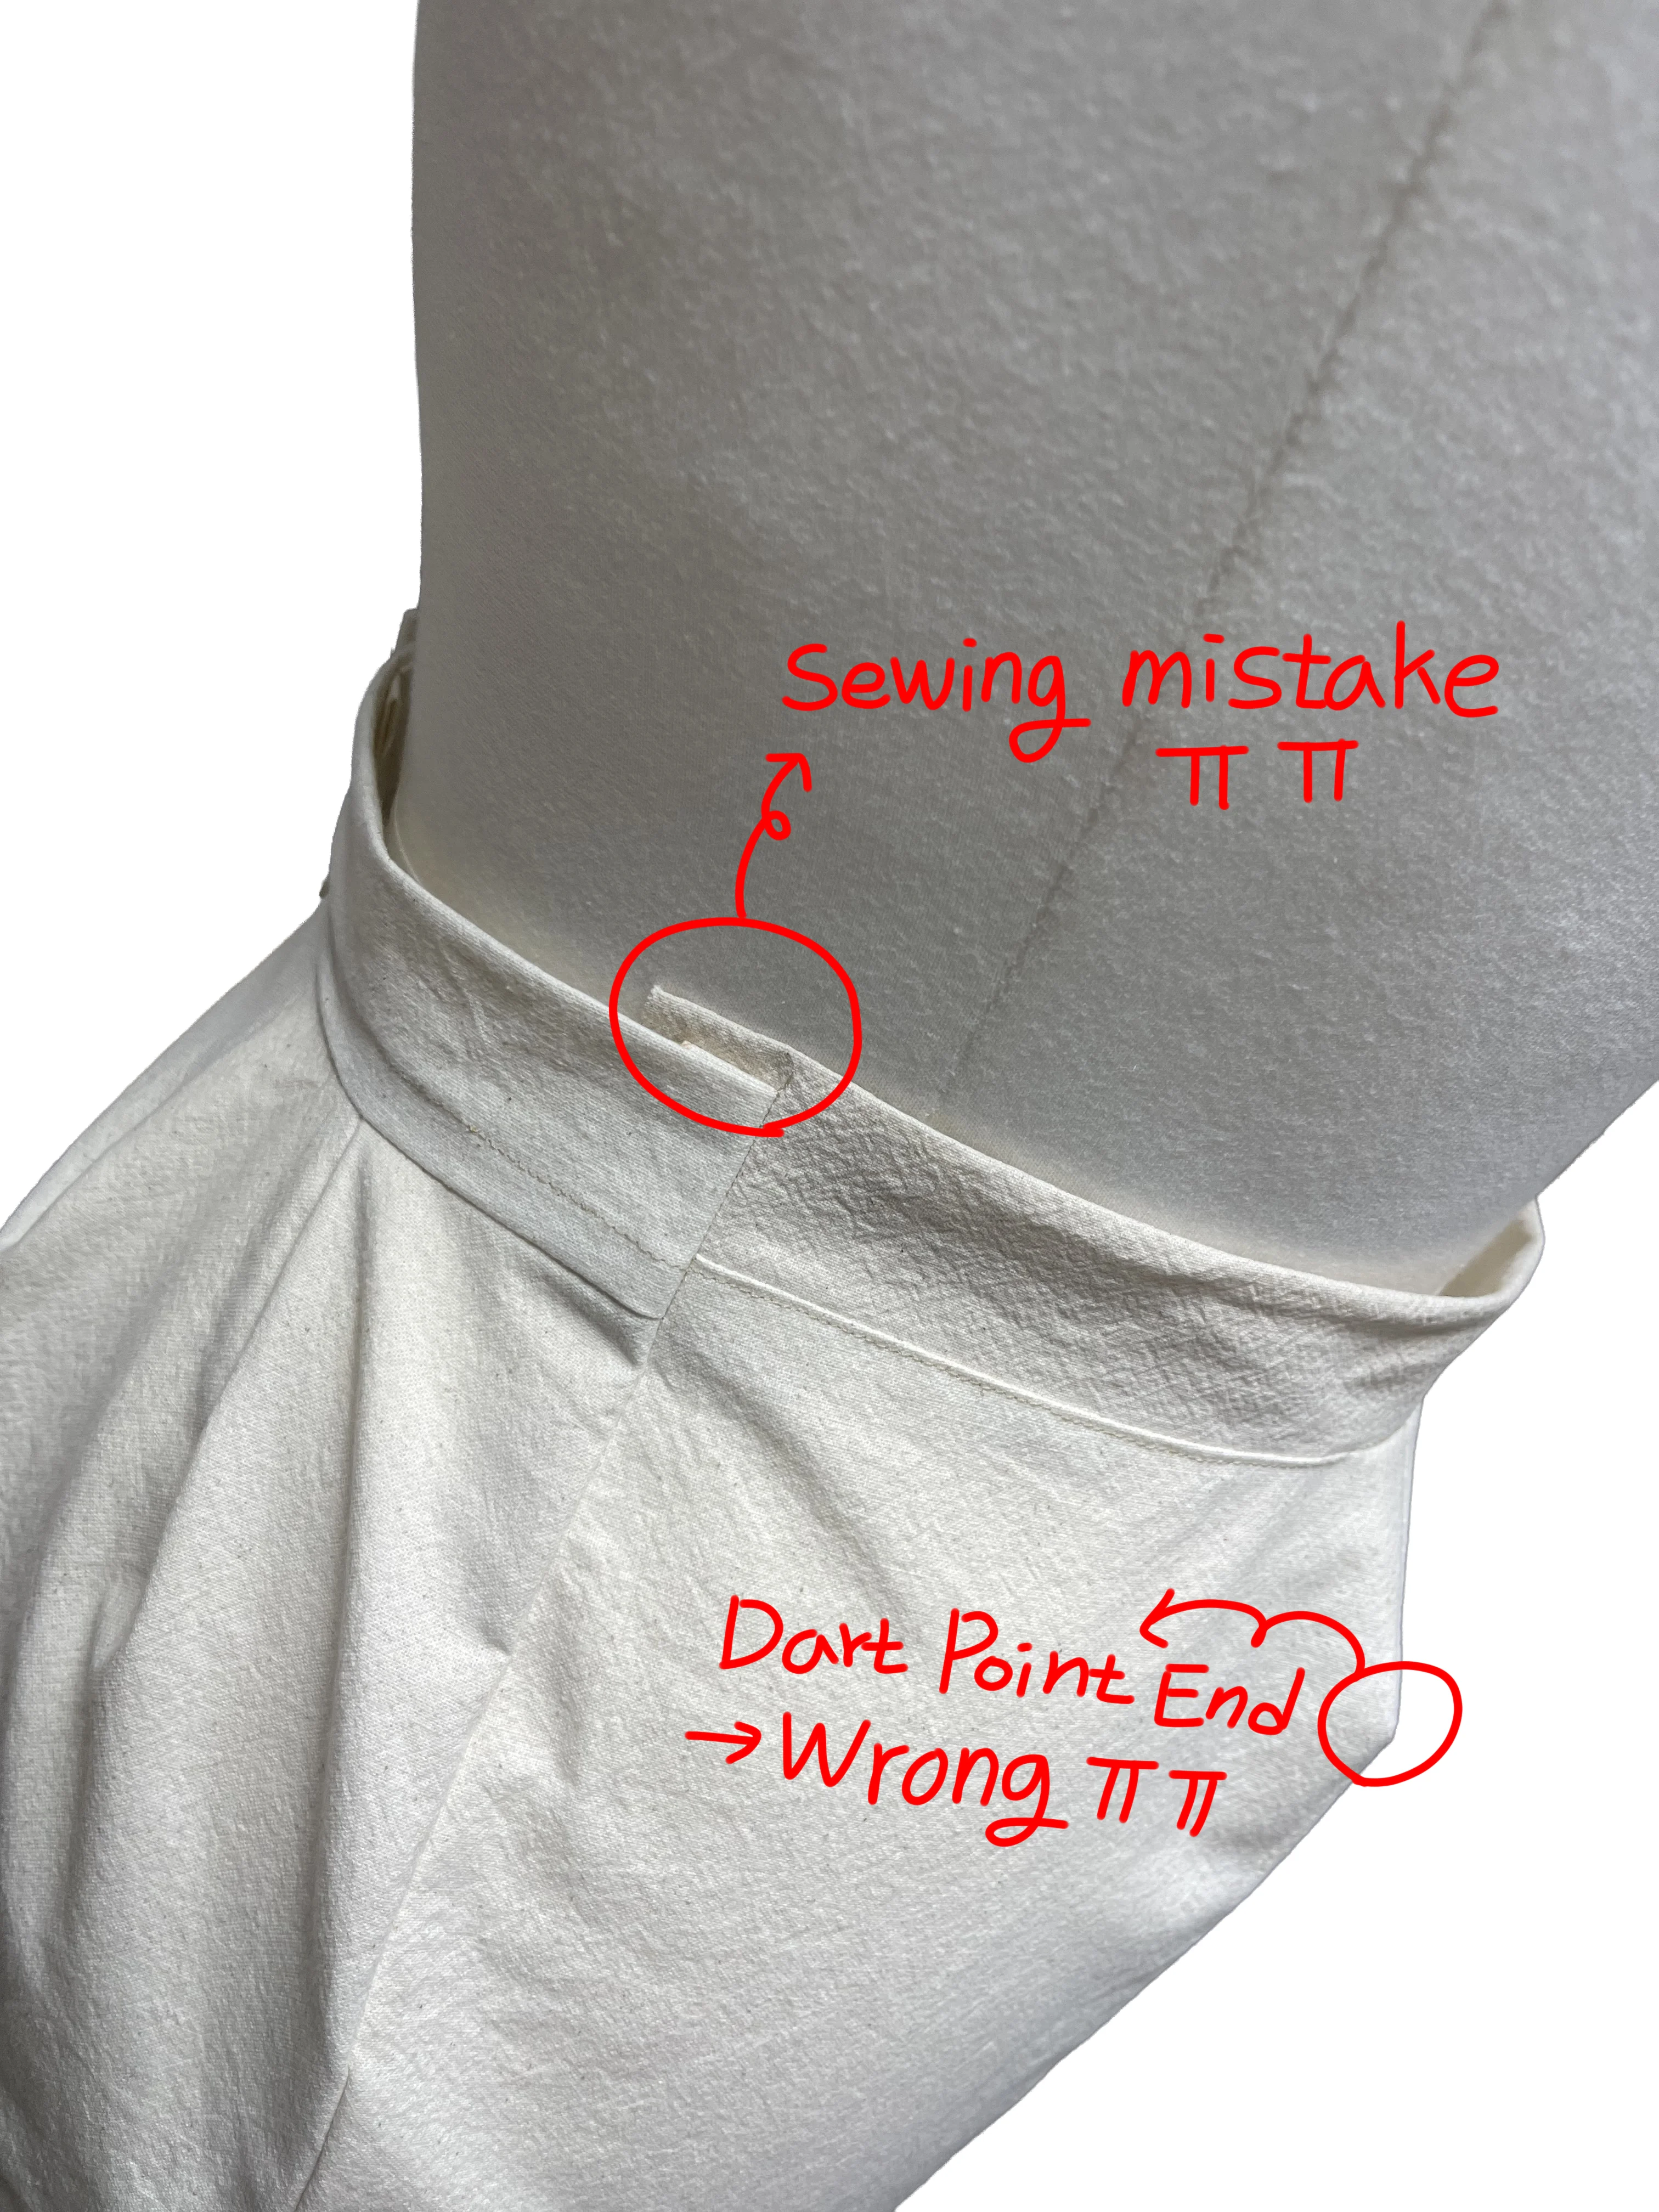
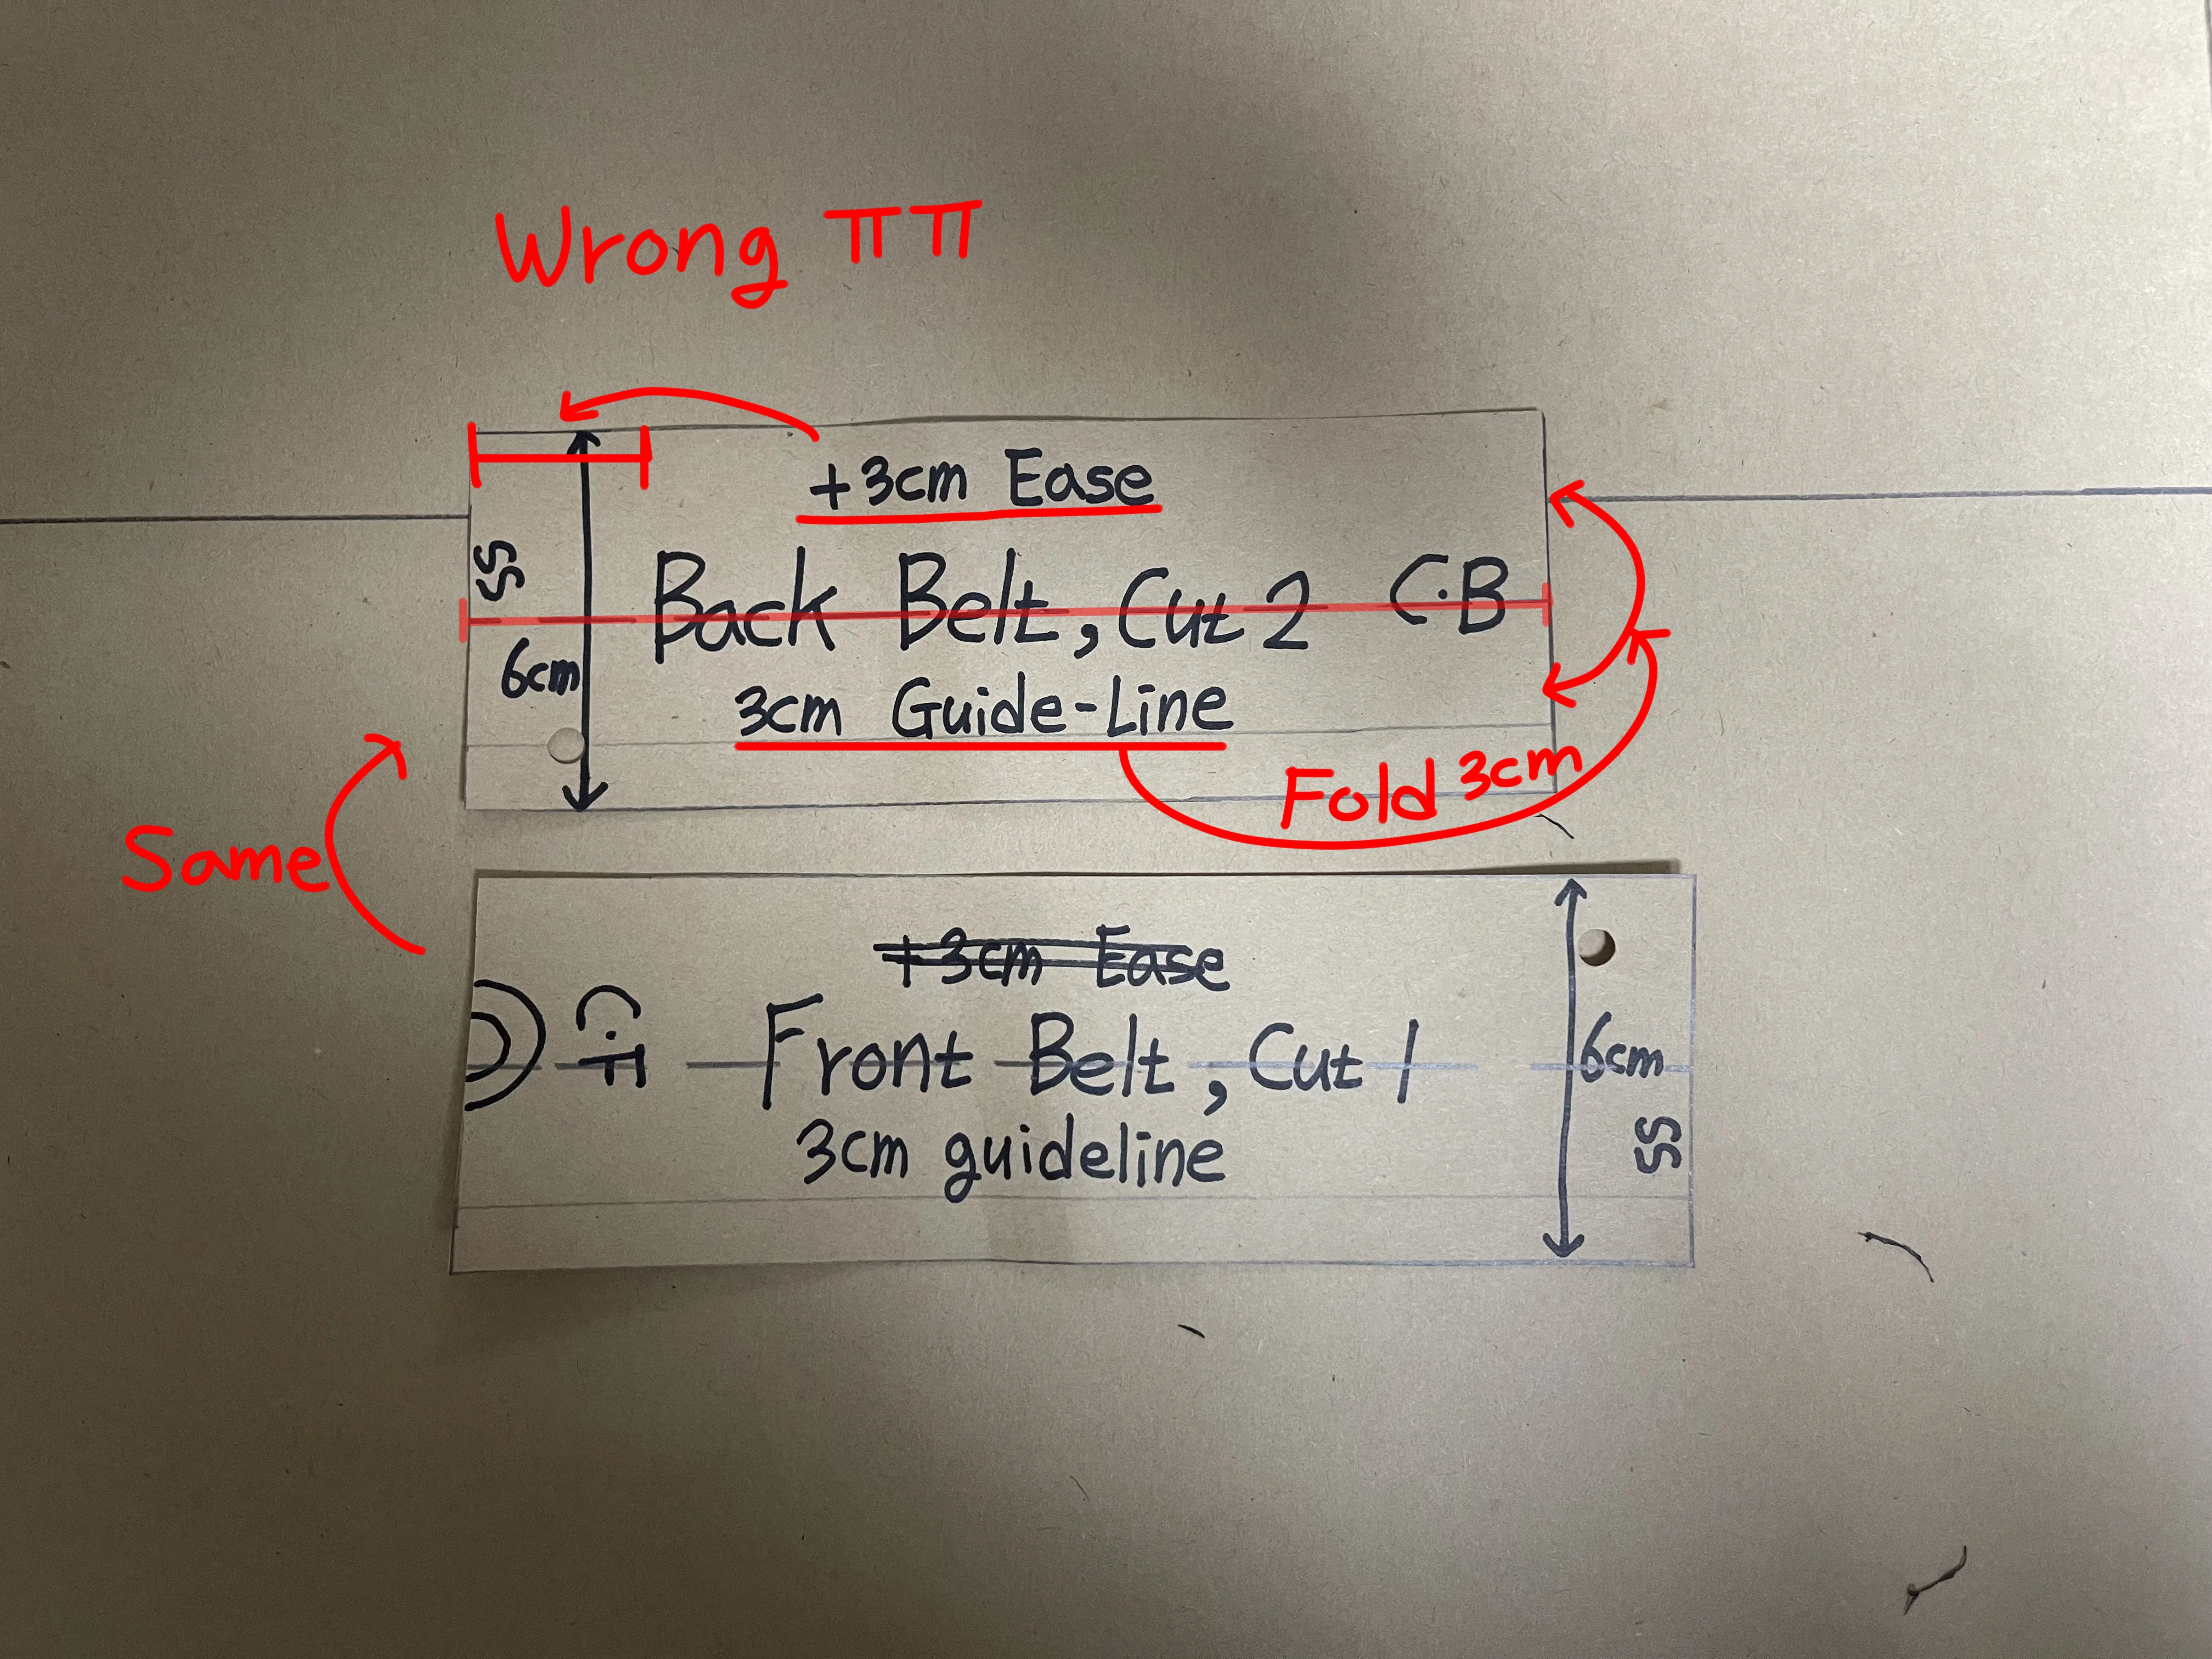
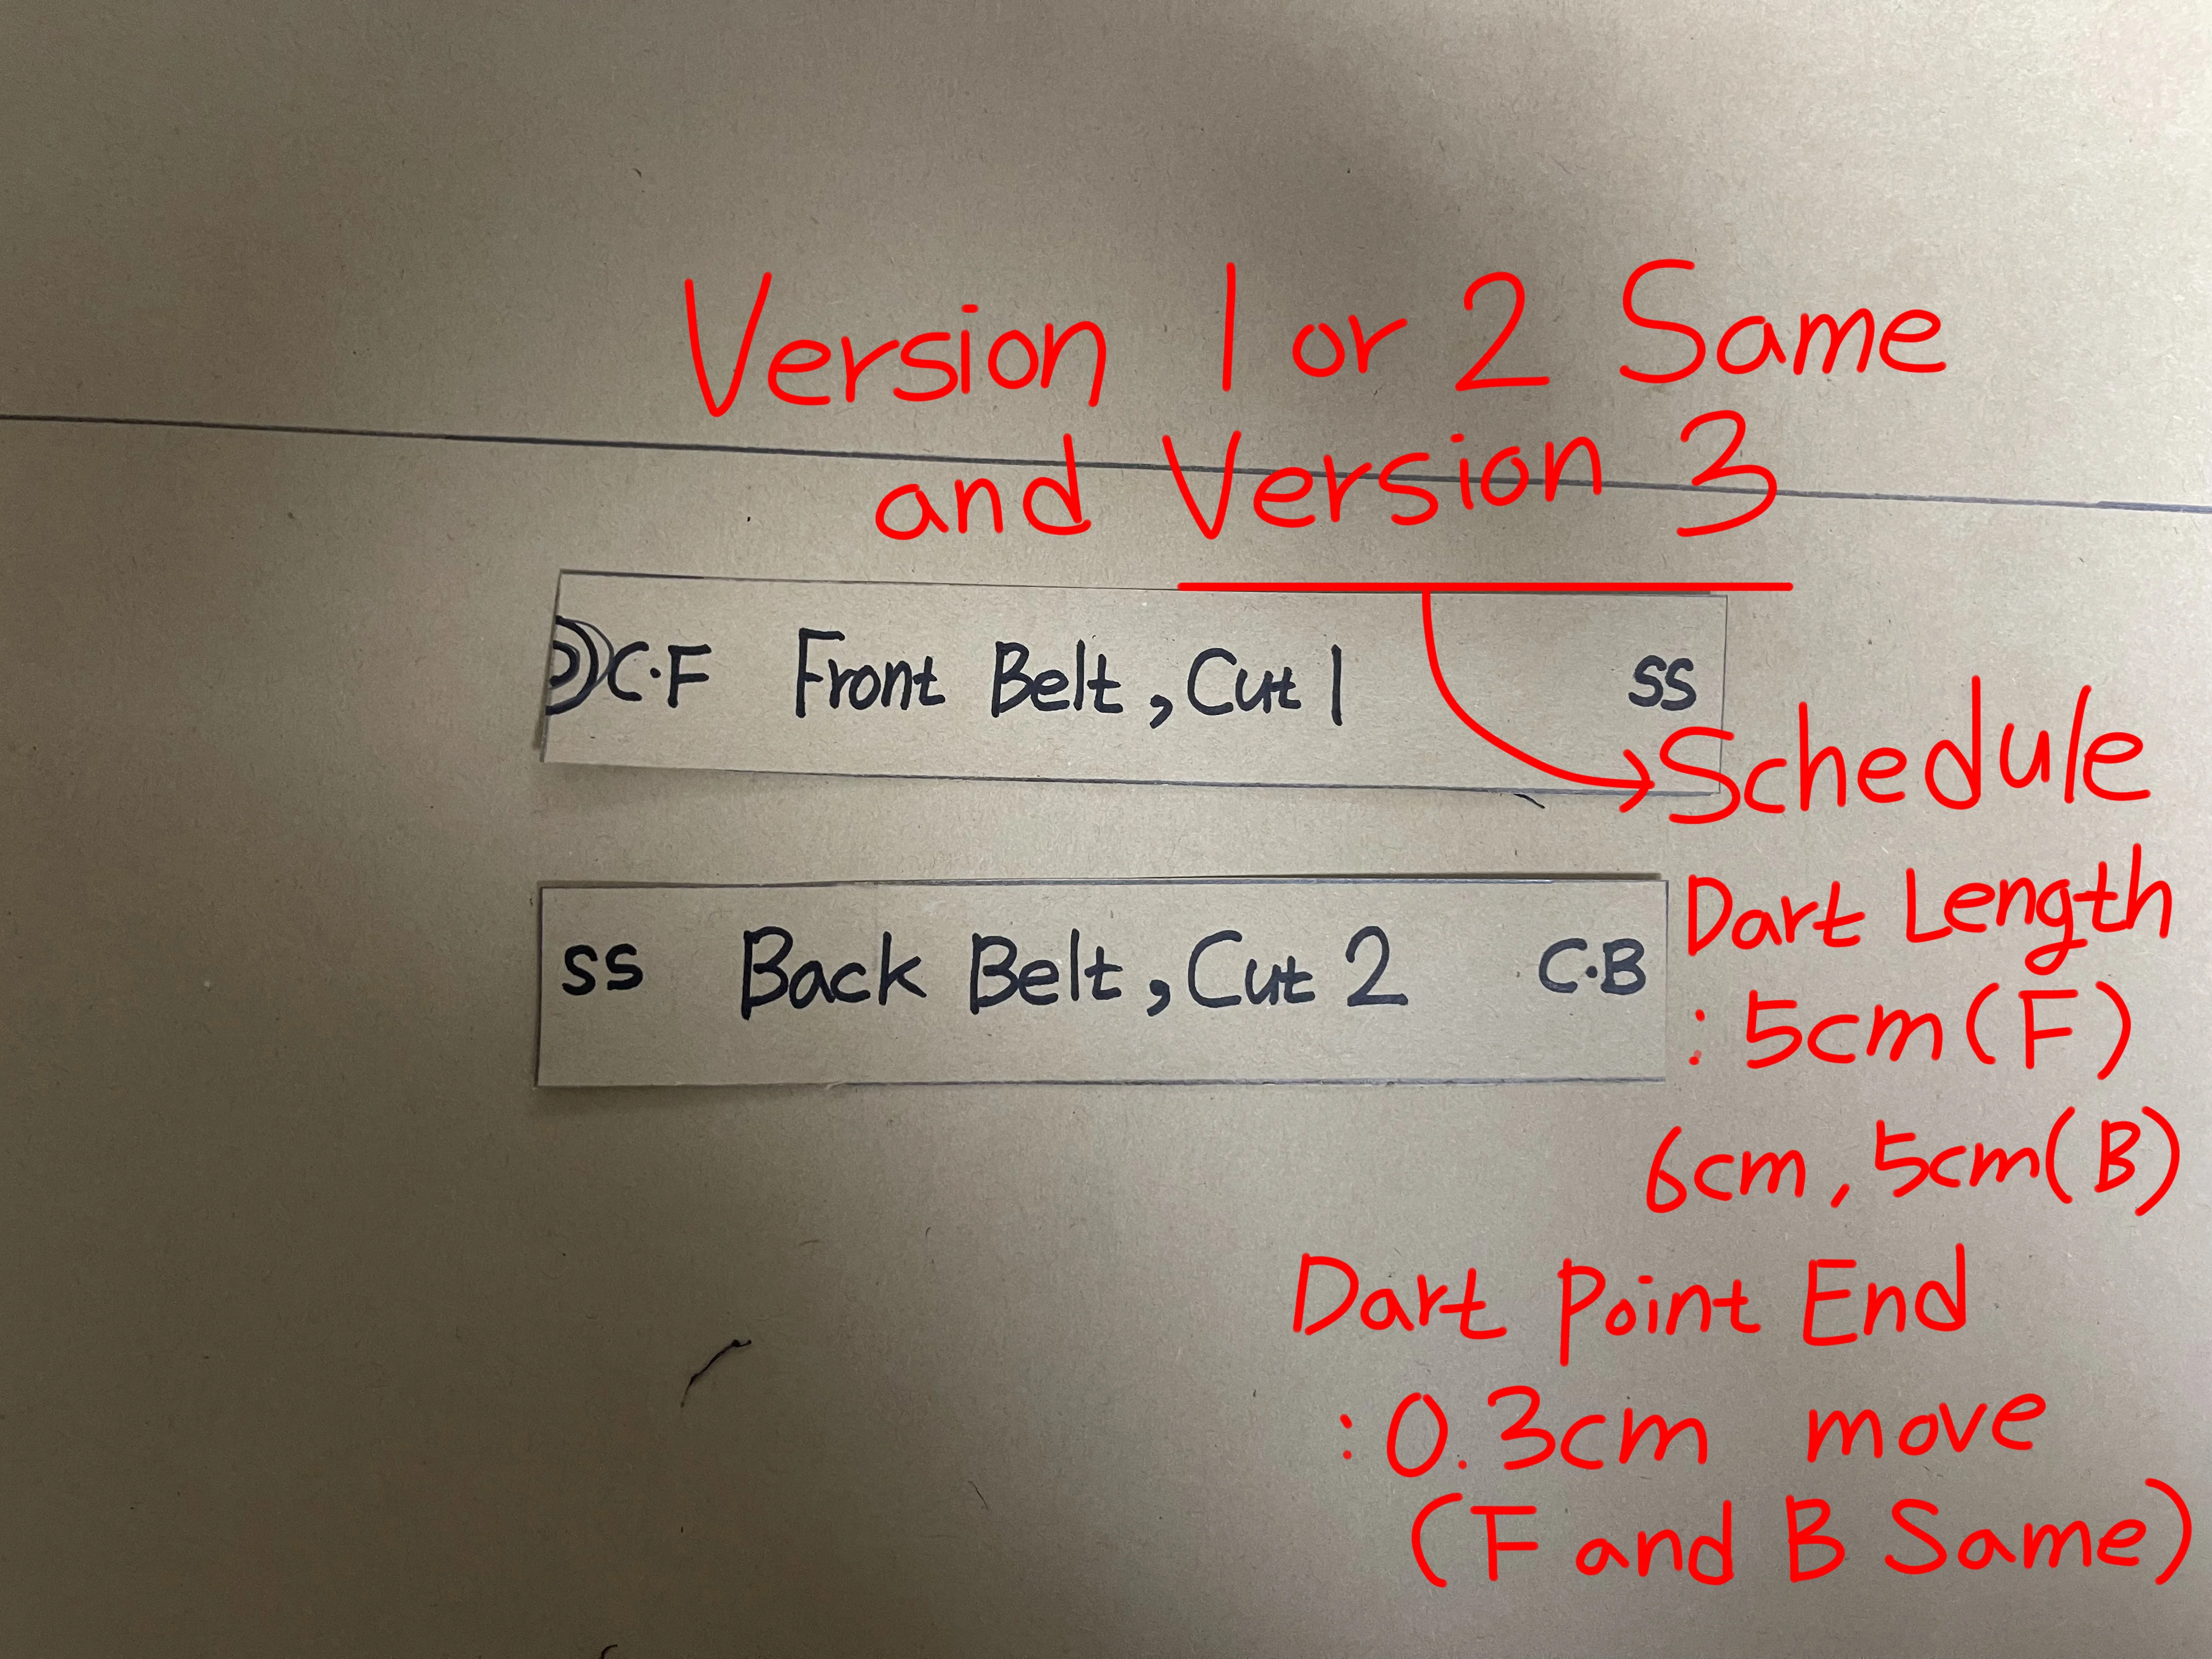
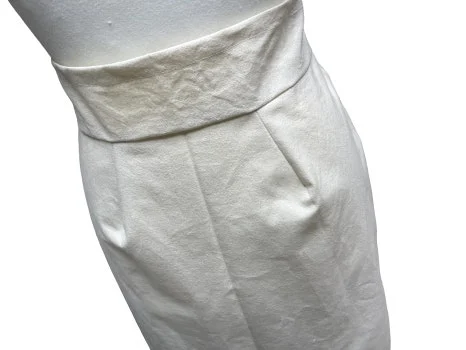
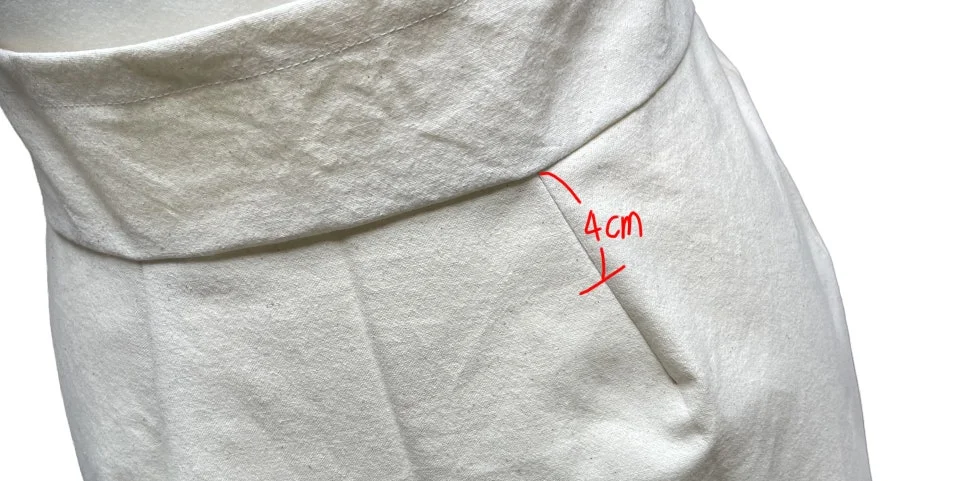
I usually set the waistband width to 5 cm, but for the second fitting, I increased it to 6 cm. However, the waistband occupied more space around the waist than expected, so I am considering reducing it to 3 cm. (This is because I plan to incorporate elastic into the waistband in future designs and may also consider pairing it with a jeogori.)The dart length on the front panel was too long, and the excess length caused lifting and wrinkling. As shown below, the surplus in dart length made the dart point appear noticeably raised. For the third fitting, I have decided to set the dart length to 4 cm, as this seems to provide an appropriate balance and is unlikely to produce wrinkles or lifting.
2. Back Panel Analysis
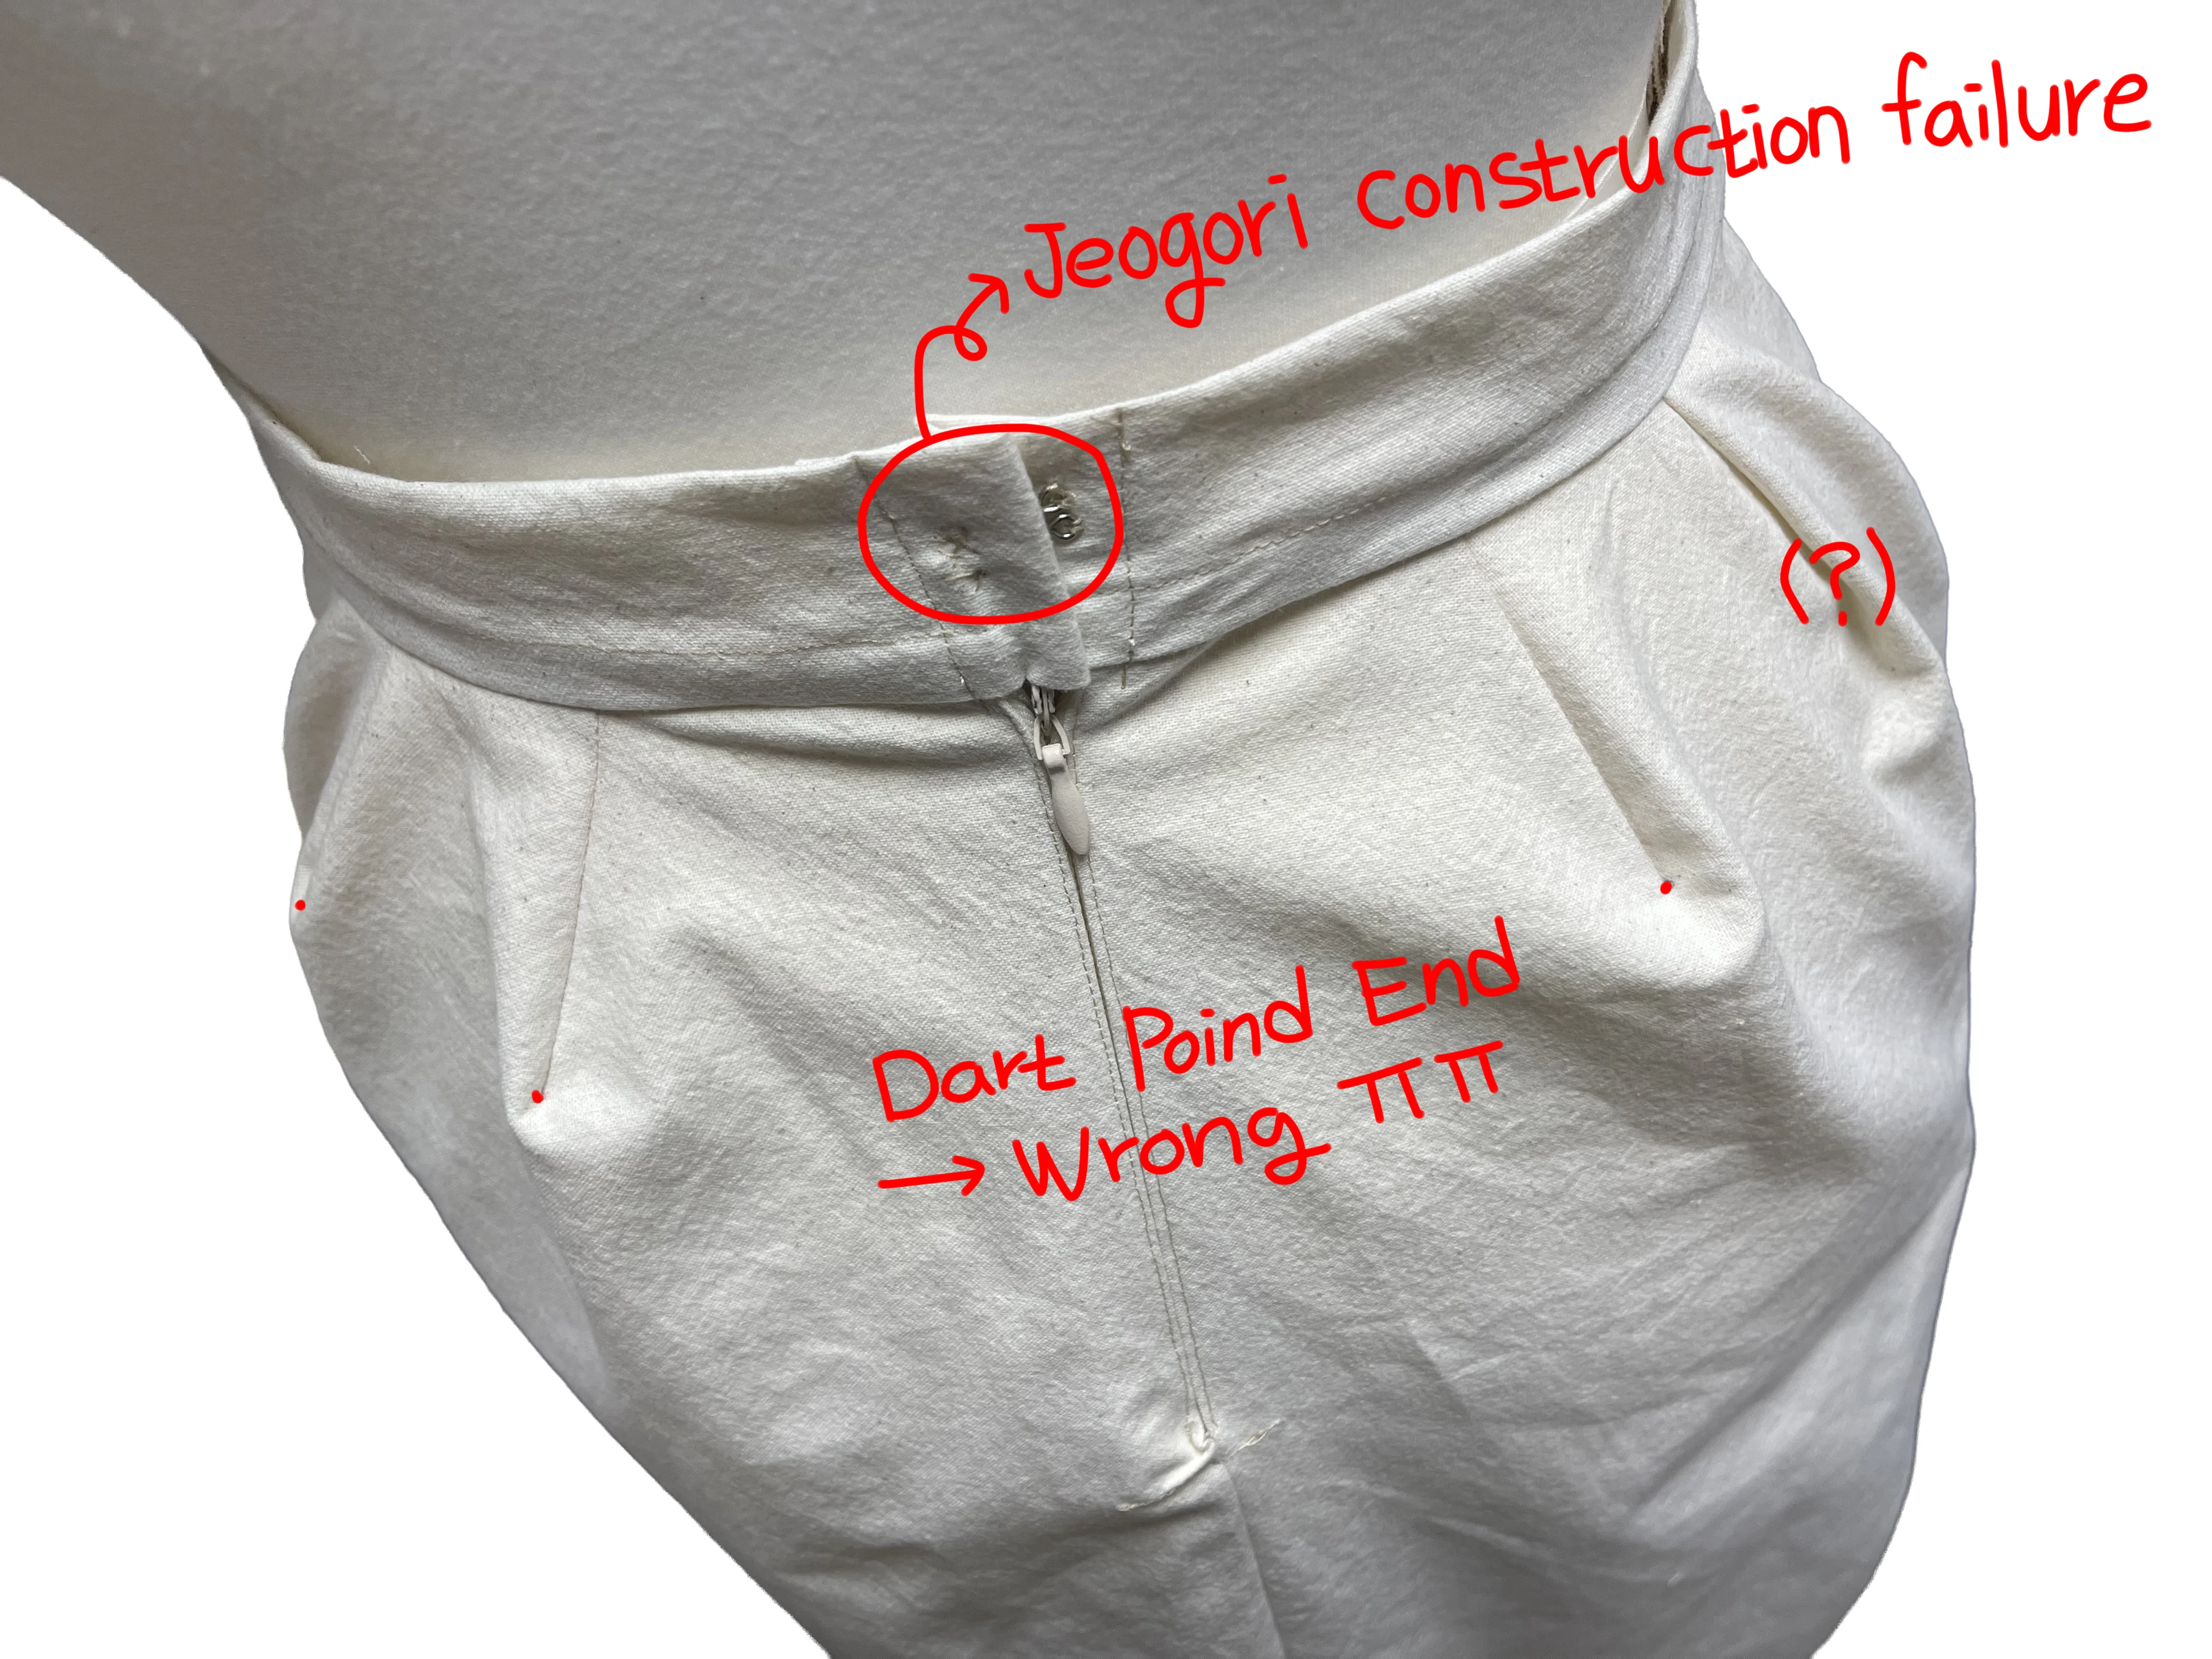
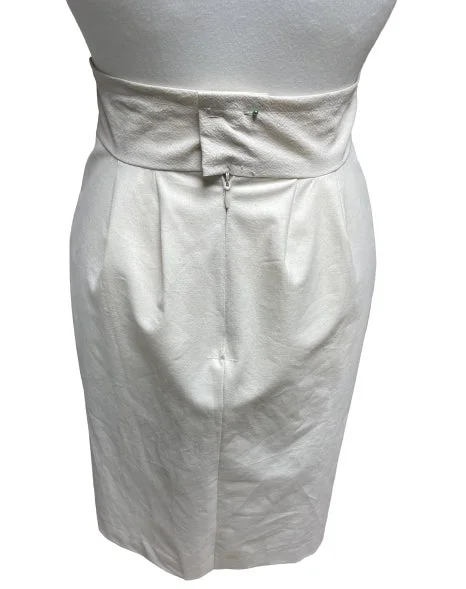
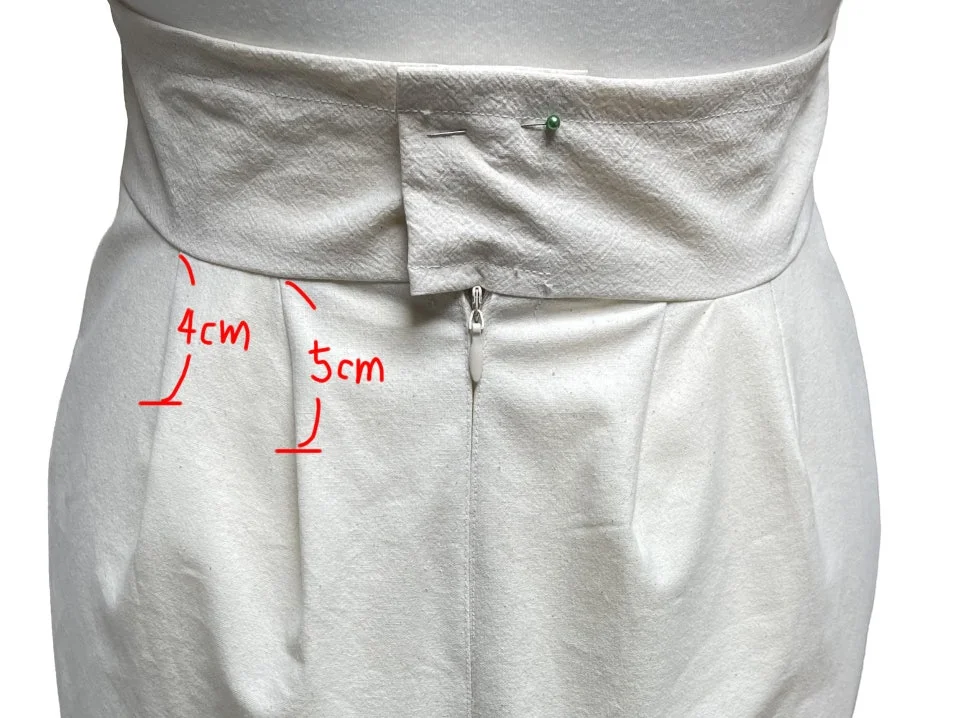
The direction of the dart point was incorrect. Instead of distributing toward the side seam, it concentrated toward the center back (CB). The dart point adjustments for both the front and back panels were shifted by approximately 1 cm, which resulted in an appropriate volume overall.In terms of dart length direction, the front panel appeared correct. However, one regrettable aspect was that, due to drawing the front and back panels together rather than separately, I failed to properly recognize the directional issue. This led to a significant oversight, particularly in not accurately verifying the adjusted dart point position on the back panel.
For the third fitting, I will again apply a 1 cm shift to the back panel dart point, but I also plan to revise the dart length. Excess length in the dart caused wrinkles and lifting near the dart point, indicating the need for correction. Therefore, I intend to test dart lengths of 5 cm and 4 cm for the back panel.
3. Side Seam Analysis
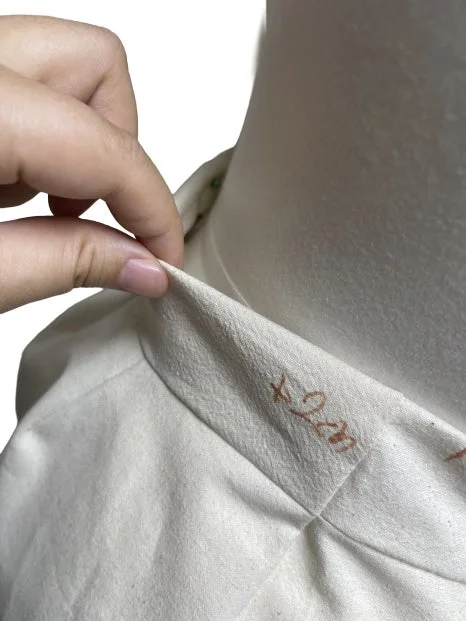
The right and left side seams differed from the mannequin’s alignment. Upon checking, I found that the front panel occupied approximately 2 cm more width than the back panel.Accordingly, in the next pattern, I plan to add 2 cm to the back panel width and subtract 2 cm from the front panel.
This process also led me to reconsider my approach to measurements. I initially set the waist circumference at 70 cm, but it turned out to be looser than expected, giving a slightly slack appearance. I therefore considered reducing it to 68 cm. However, through marking, I realized that a reduction of approximately 1.5 cm was possible. Subtracting 1.5 cm from 70 cm results in 68.5 cm, but this 0.5 cm difference could lead to significant calculation errors in side seam reduction and dart distribution.
For this reason, I ultimately chose to retain 70 cm as a stable and reliable measurement, as using 68 cm might result in an ill-fitting waist.
Start of a New Project: Average Women’s Size 66 Tight Skirt Block Pattern
Regardless of the third pattern adjustments, my next post will introduce a new project based on the lessons learned from this fit analysis. I plan to develop a tight skirt block pattern using the average measurements of a size 66 female mannequin.The confirmed measurements are as follows:
- Waist circumference: 70 cm
- Hip circumference: 96 cm
- Hip depth: 20 cm
- Skirt length: 60 cm
All calculations will be conducted in centimeters.
A key principle of tight skirt patternmaking is that the difference between hip and waist circumference determines both the side seam reduction at the waistline and the distribution of darts between the front and back panels. This difference is critical, and the use of approximate inch values can lead to major calculation errors. Therefore, I have chosen to work in centimeters for precision.
That said, the concept of approximation used in inches can still be applied intuitively within the centimeter system.
Additionally, the same measurements (waist 70 cm, hip 96 cm, hip depth 20 cm, skirt length 60 cm) were used in the third pattern. However, it was not possible to adjust the front and back panel widths by ±2 cm in that version.
During sewing, issues arose from not folding the darts beforehand. I resolved this by sewing the darts first and then manually blending and trimming the waistline. This method requires a certain level of skill. If it proves difficult, it is recommended to fold the darts first and then draw the waistline based on the folded shape.
The reason I connected the waistline after sewing the darts was due to the thickness limitations of kraft paper, which made it difficult to pre-draw a smooth waistline. Additionally, since the back panel consisted of two separate pieces without a fold line, I cut them separately and overlapped them to replicate the same shape.
I did not focus heavily on the waist circumference during sewing, as the 1.5 cm seam allowance effectively concealed minor inaccuracies.
On Seam Allowance
I chose a 1.5 cm seam allowance for practical sewing reasons. When using a 1 cm seam allowance, it is easy to deviate from the line, and it is also difficult to secure accurately with pins. Therefore, I opted for a slightly wider 1.5 cm allowance for greater ease and stability.To my knowledge, the standard waist seam allowance is 1 cm, so I would like to clarify that my use of 1.5 cm is a practical adjustment rather than a deviation from standard practice.
I plan to write more about seam allowances once I gain a deeper understanding. At present, as a beginner, I found the 1 cm allowance difficult to handle during sewing, which led me to prefer a wider and more manageable seam allowance.